If you’ve ben with us for the beginning, you’ll know there is one flavor combination that I love. Chocolate and peppermint. The classic flavor of creamy, rich dark chocolate paired with cool and refreshing peppermint…I can’t resist it.
My peppermint brownie cookies and peppermint sugar cookie bark are two favorites, but during the holidays, I love holiday candy. And a no bake dessert recipe is an easy fix for a craving. Today I’m teaching you how to make peppermint bark. You’ll love how quick this recipe is.
About this Peppermint Bark Recipe:
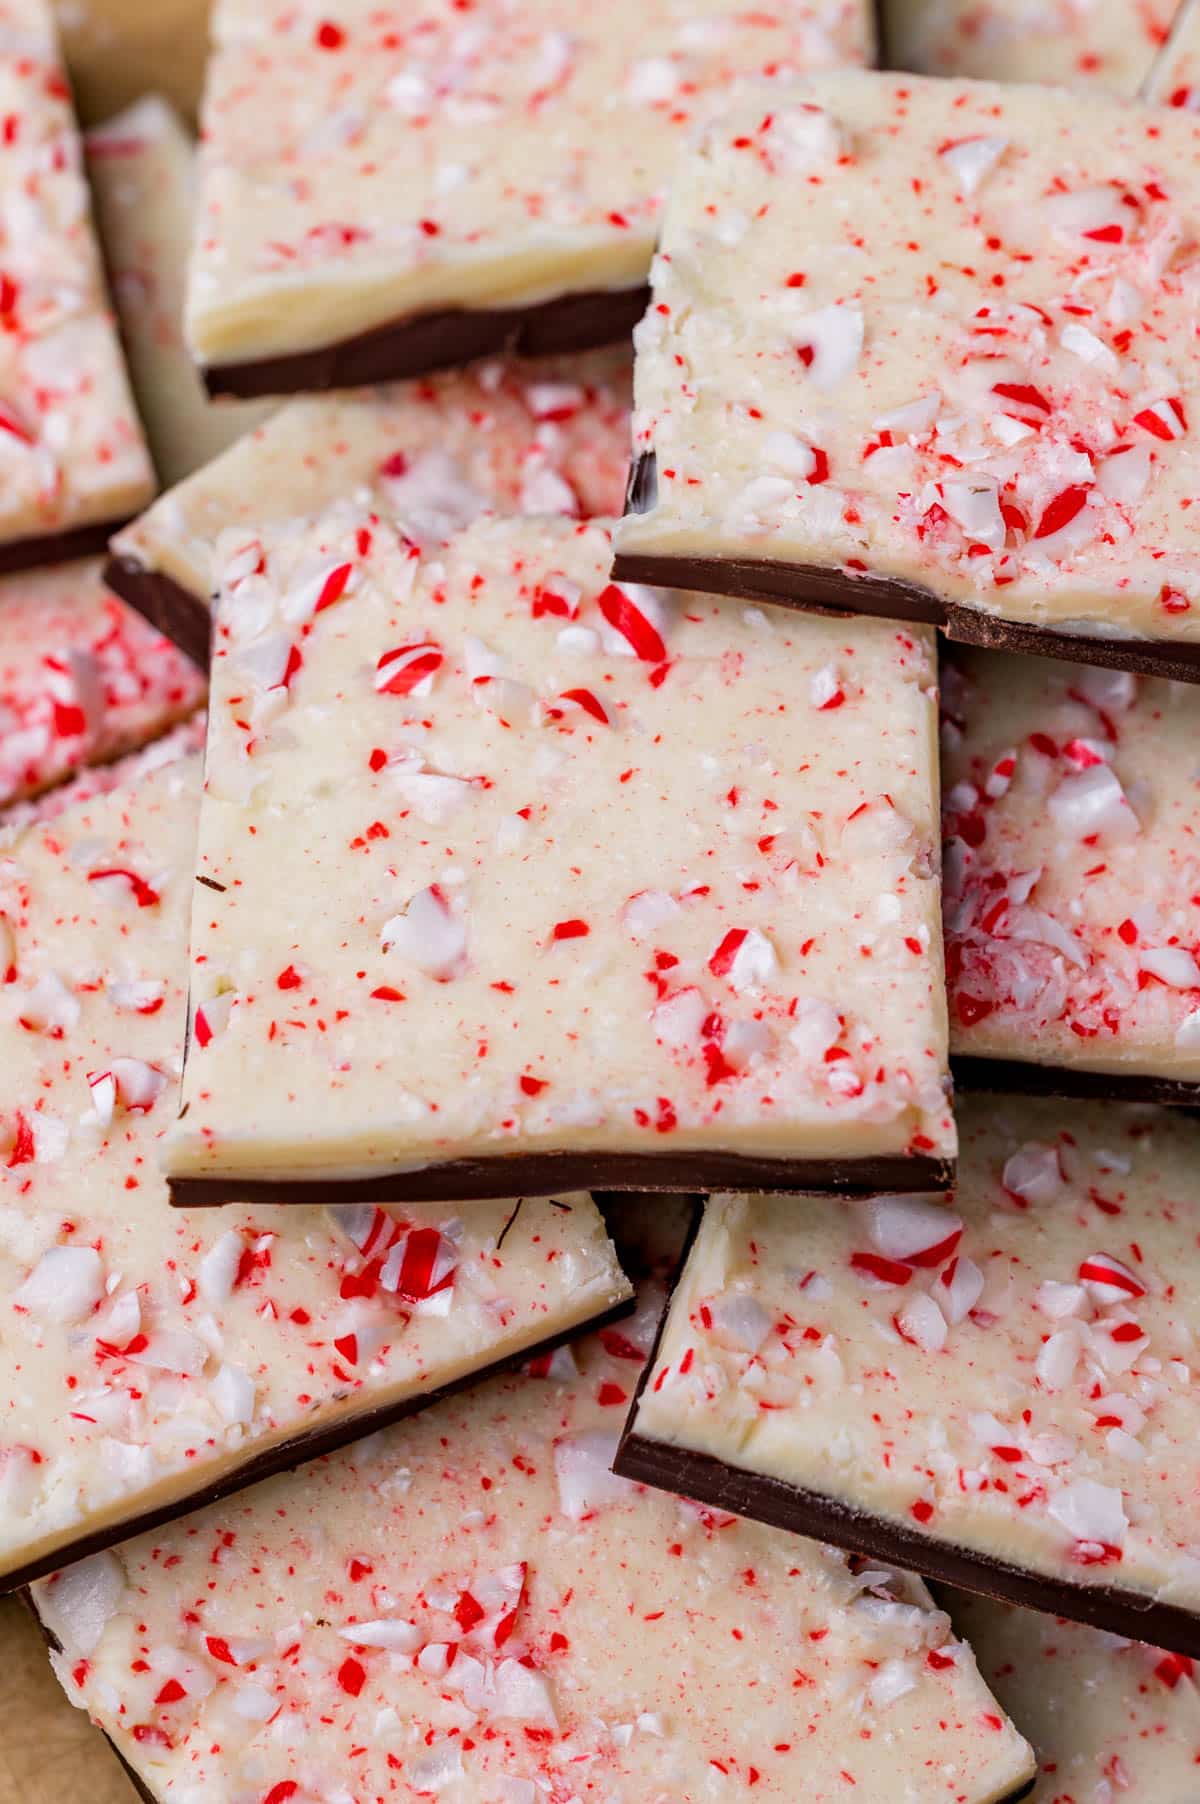
Flavor: Chocolate, white chocolate and peppermint. I don’t normally love white chocolate, but with the peppermint extract added in, it makes it irresistible.
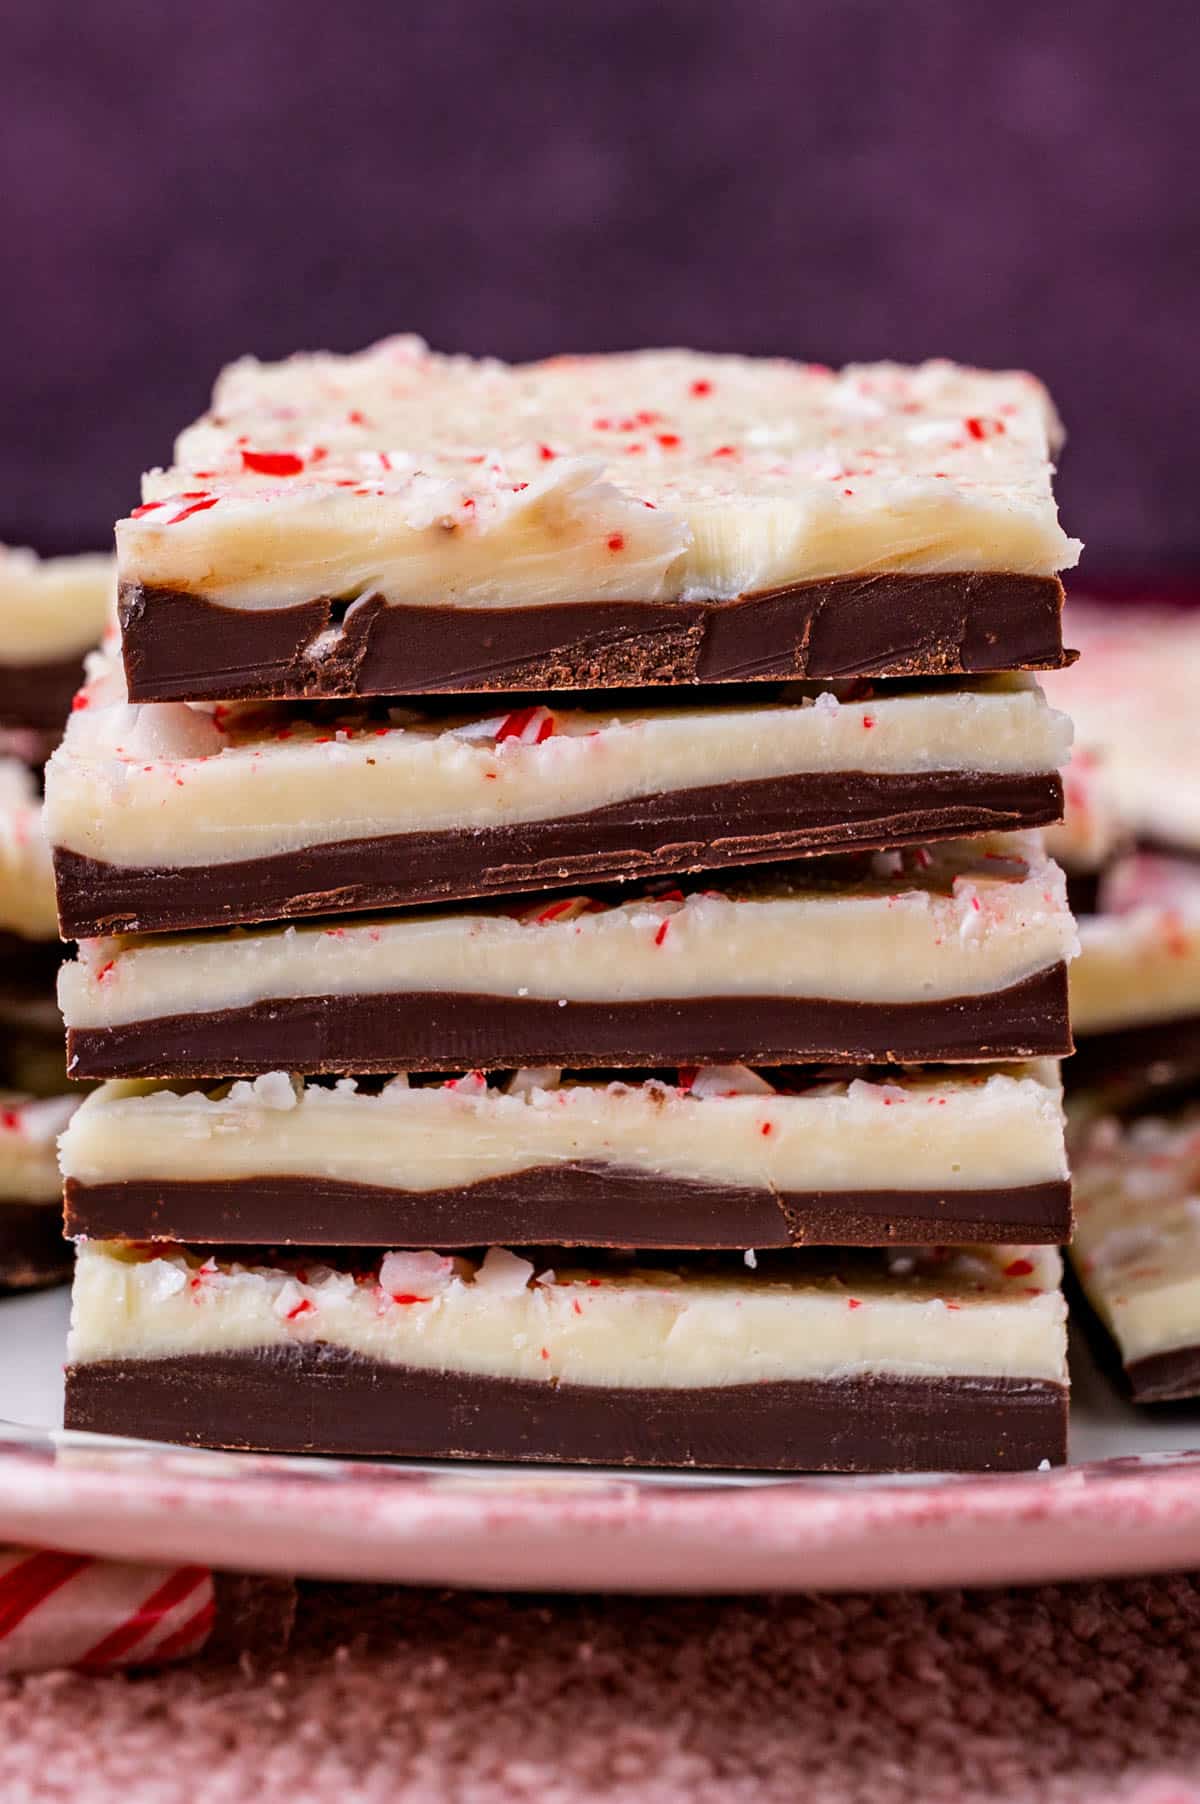
Texture: If you use a high quality chocolate, this peppermint bark will be firm and “snap” when you break it.
Method: I’ll teach you below how to temper the chocolate when you melt it. You’ll do that step on the stovetop. Otherwise you need only a parchment lined baking sheet.
Ingredients
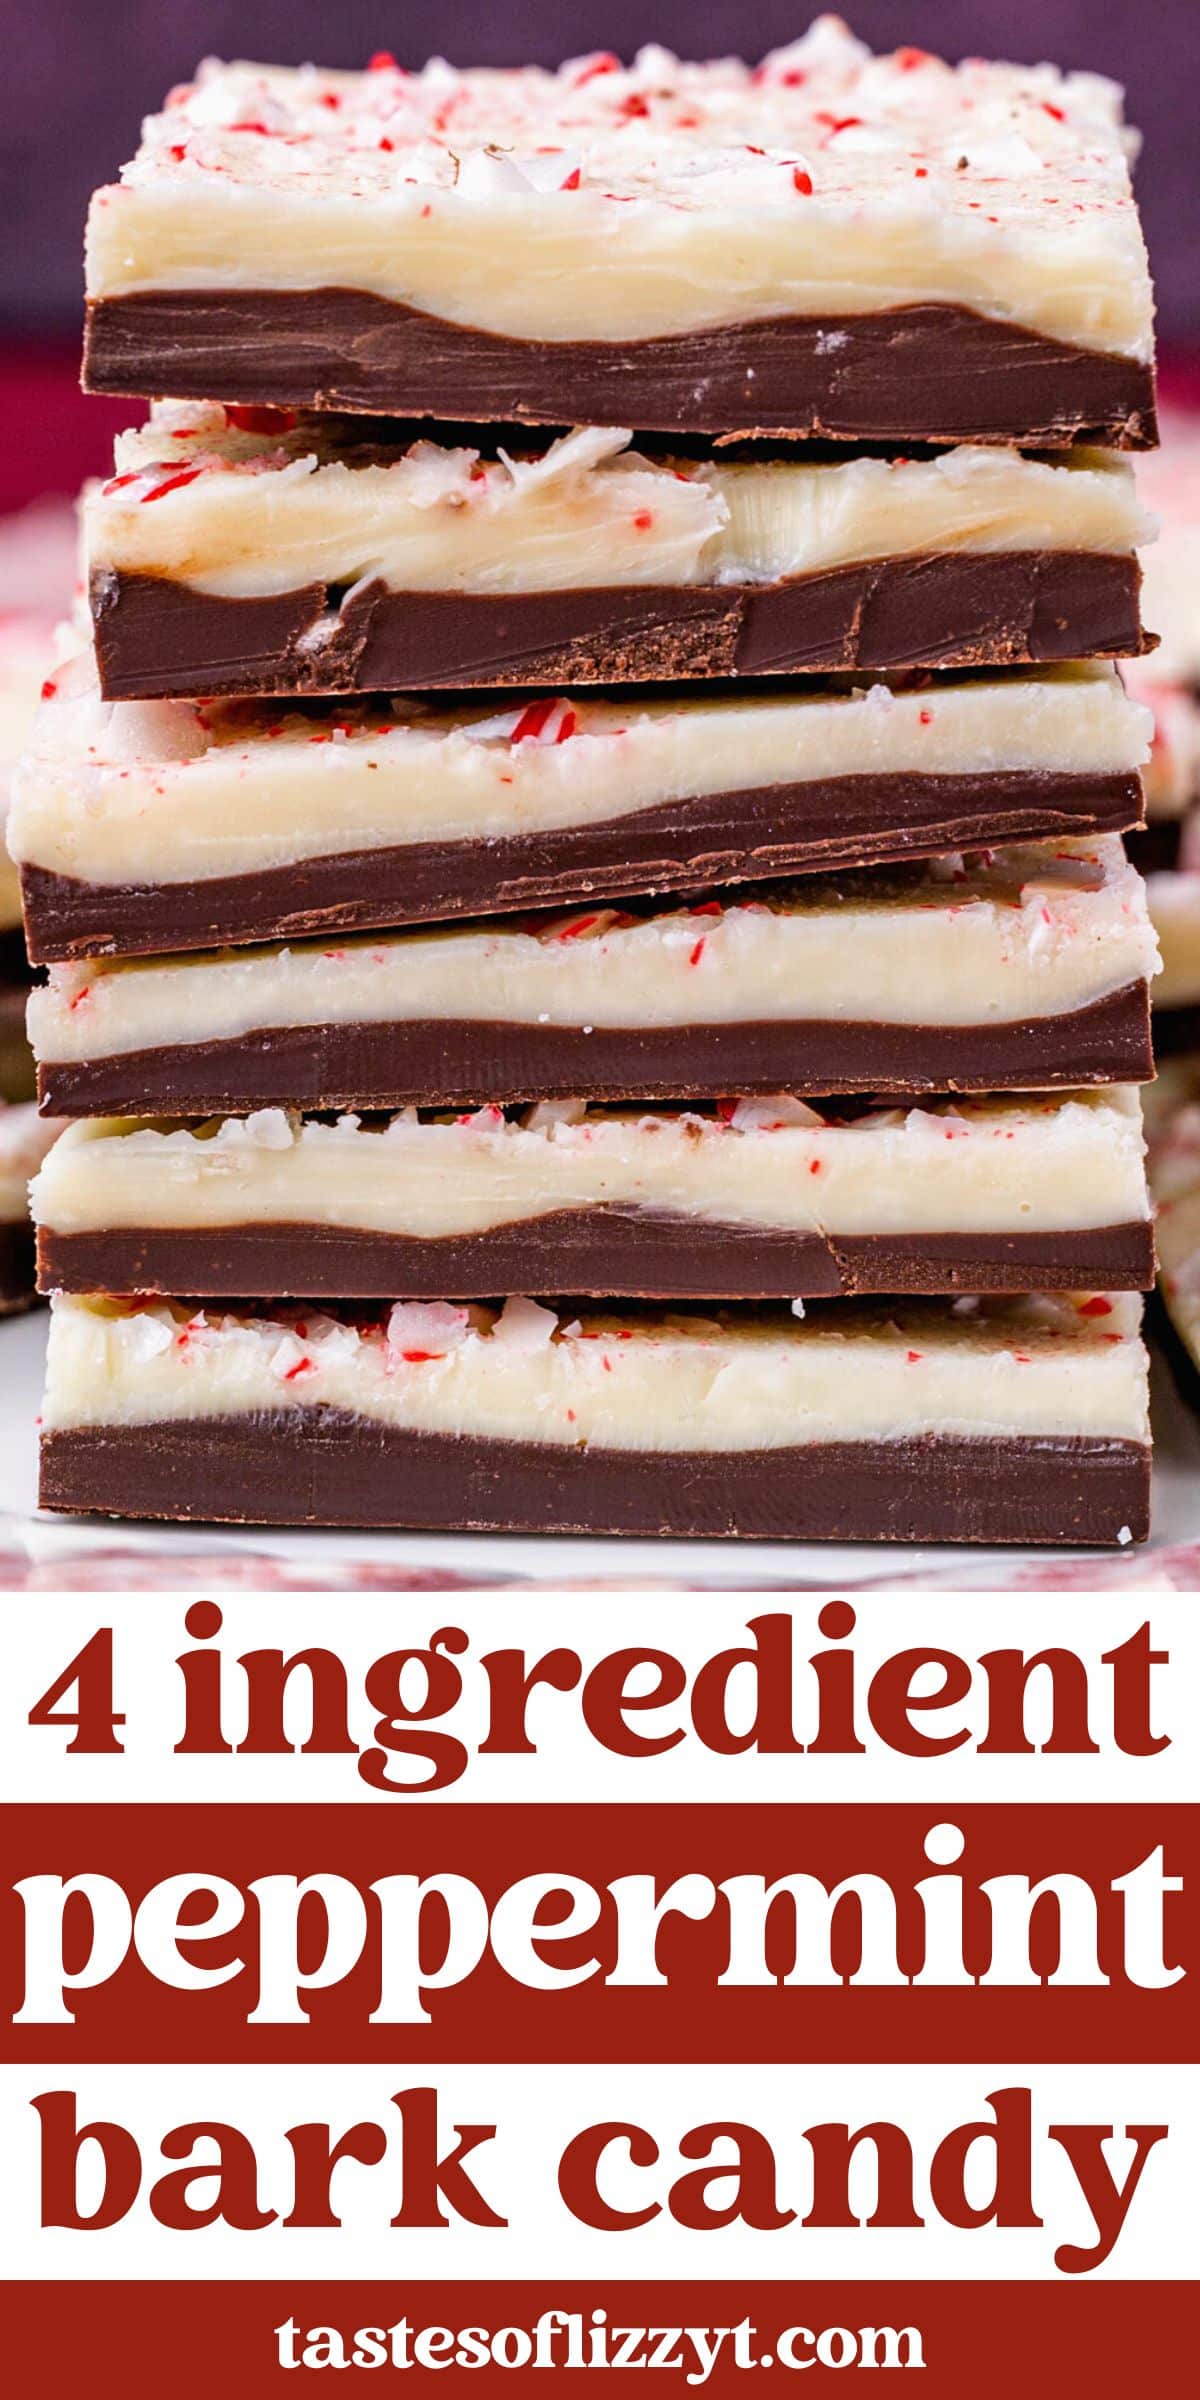
There are just 4 ingredients, two of which are chocolate. This mean means you need to choose a high quality chocolate that you love the flavor of. I recommend Ghirardelli or Lindt brand chocolate bars.
One note about the ingredients. Choose chocolate bars that are both made with real cocoa butter rather than palm oil. This will help the peppermint bark layers stay together.
Chocolate. Use melting wafers or a chocolate bar that you chop up into small chunks. Chocolate chips do not work the best for this. They are meant to keep their cute little shape during baking so won’t melt super smoothly. I used Ghirardelli semi-sweet 4 ounce chocolate bars.
White chocolate. The same goes for white chocolate. Our store was out of Ghirardelli white chocolate bars, but Lindt worked beautifully. Again, white chocolate chips will not melt well so use a bar.
Peppermint extract. Many ask if you can use peppermint oil, but I’ve not tried that. I’ve only used a liquid extract. Please note that mint extract has a different flavor than peppermint.
Candy canes. If you can find pre-crushed candy canes, that will save you a step. I crush candy canes in a zippered bag and a meat mallet or rolling pin. It’s a good holiday stress reliever. 😉
How to Make Peppermint Bark
This simple recipe calls for melting two types of chocolate and mixing in some peppermint extract. Easy, right? I do take time to temper chocolate, which involves heating chocolate to a certain temperature, then adding in unmelted chocolate to bring the temperature down. Tempering chocolate is important to keep that “snap” that we all love in a chocolate bar.
Do you have to temper the chocolate for this recipe? Not necessarily. You could just microwave the chocolates to melt them and then spread on a lined baking sheet. That is the easiest way. But you’ll get the best results if you follow our instructions below.
You’ll need a double boiler to melt the chocolates. Or you can use a glass bowl that fits snugly in the top of a saucepan. Just make sure the bottom of the glass bowl will not touch the water that is on the bottom of the pan.
Place one inch of water in the bottom of the double broiler or saucepan. Set the pan over medium heat and allow it to start heating.
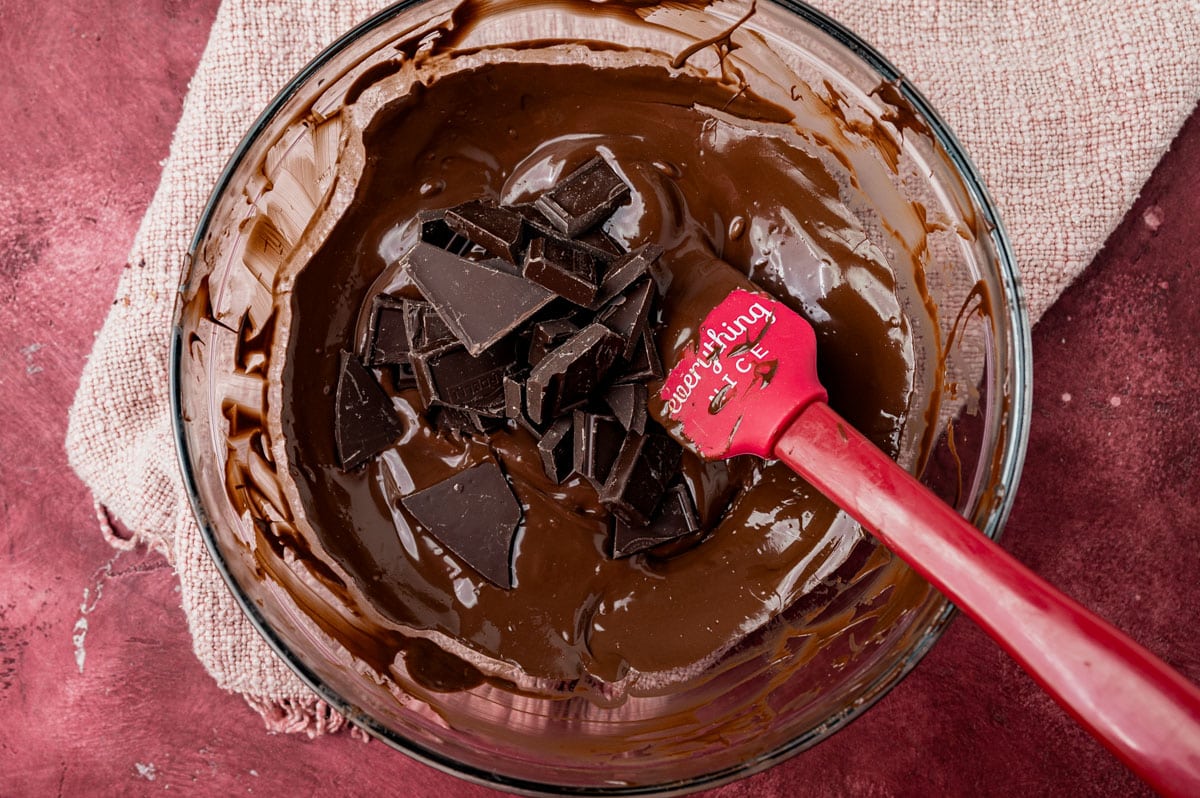
Place 2/3 of the semi-sweet chocolate into the top of the double boiler or in the glass bowl. Place the pan or bowl over the steaming water. Make sure that none of the water gets in the chocolate or it will seize up.
Stir the chocolate constantly as it melts. Continue to heat, melt and stir until the temperature of the chocolate reaches 110°–115°F. When the chocolate reaches this temperature, remove it from the heat and immediately stir in the remaining ⅓ of the chocolate. Stir until the mixture is completely smooth.
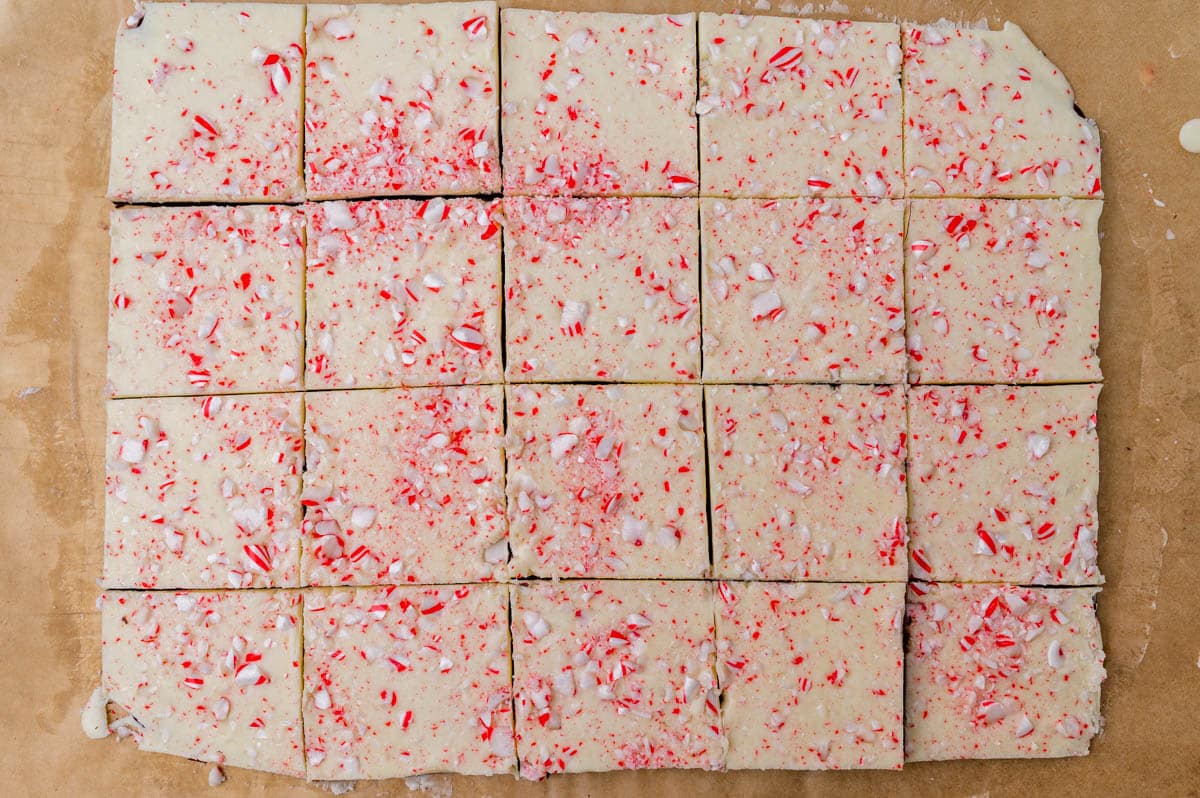
Pour the melted semi-sweet chocolate onto the prepared pan. Use a rubber spatula to spread the chocolate into a large rectangle. Try to make the chocolate as even as possible, and make it as thin or as thick as you’d like. I ended up with a rectangle that was about 12×15″.
Shake the pan slightly to even out the chocolate layer.
Repeat the chocolate melting process with the white chocolate. (Clean the pot or bowl quickly if you don’t have a second one to use.)
Allow the white chocolate mixture to sit for about 3 minutes. Then pour it slowly and evenly over the semi-sweet chocolate. (The semi-sweet chocolate should not be set yet. You don’t want it to set fully before adding the white chocolate. This will help the layers stick together.)
Use an offset spatula to lightly spread the white chocolate if needed, but I didn’t have to do this much since when I poured it, it covered the chocolate nicely.
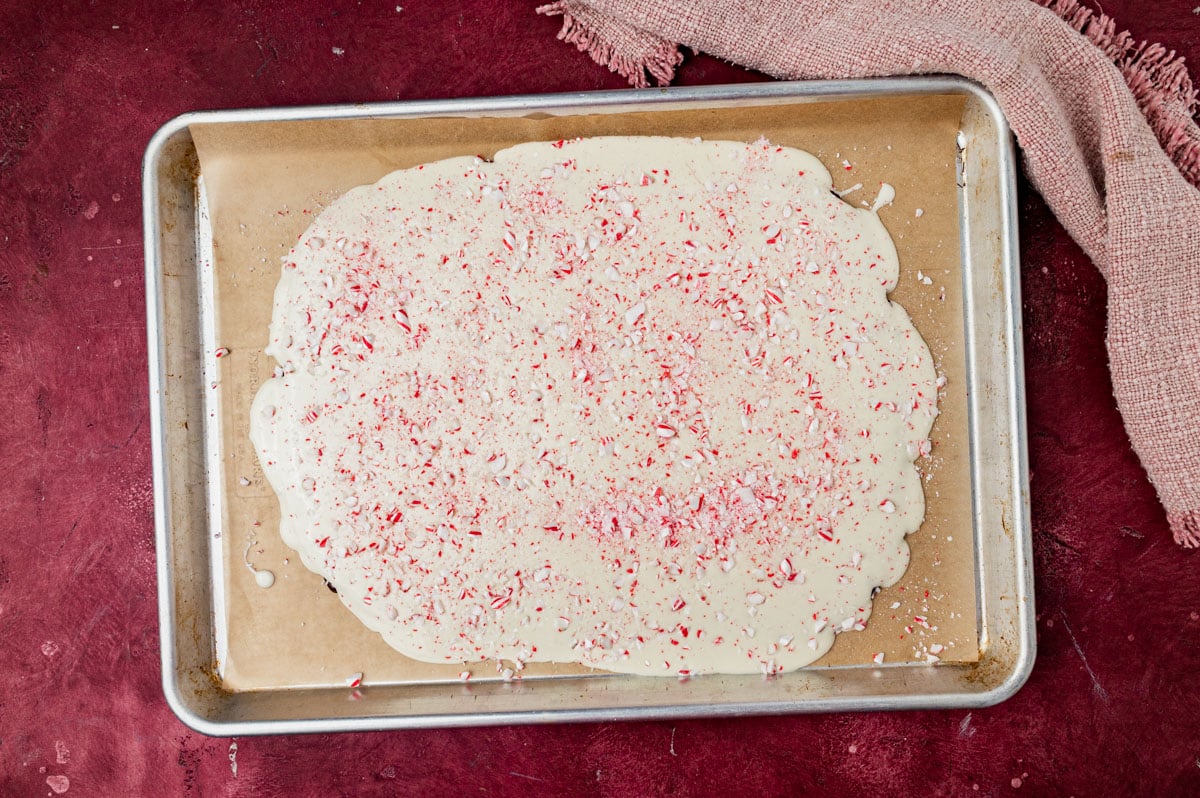
Shake the pan slightly to make a smooth top. Immediately sprinkle the crushed candy canes on top of the white chocolate layer.
Then allow the chocolate to set at room temperature until it is firm enough to cut into squares.
How do you get peppermint bark to stick together?
It can be frustrating when you go through the trouble to make a homemade candy for a Christmas gift only to have the layers separate before you can gift the holiday treat.
Here are a few tips to help yours turn out perfectly every time.
Use chocolate made with cocoa butter. Some chocolates have palm oil rather than cocoa butter. Choose both white and dark chocolate that has cocoa butter so that the oil doesn’t prevent them from adhering.
Don’t let the first layer cool. The white chocolate should go on when the semi-sweet chocolate is still wet.
Allow the peppermint bark to set at room temperature rather than in the refrigerator. Yes, this will take longer, but it will help the layers adhere better with the slow cool down.
Cut the peppermint bark while it is still slightly soft. The chocolate cuts nicely with a large sharp knife when it is about 90% set.
Recipe Variations
If you’re concerned about the layers separating, swirl the chocolates together. It will have a different look, but it will still be pretty and taste amazing.
Add coarsely crushed pretzels in the chocolate layer. It makes an amazing sweet and salty flavor.
Make 3 layers, with chocolate or white chocolate in the middle. Your choice!
Storage Instructions
Store in an airtight container at room temperature for 3 days.
Refrigerate for up to 7 days.
This also freezes well for up to 8 weeks.
How to Make Peppermint Bark
4.60 from 5 votes
Learn how to make peppermint bark with just 4 ingredients. Sharing no fail tips for perfect results, every time.
I recommend reading this recipe in advance. It's easy, but you need to be prepared for all parts so it goes smoothly.
Line a large baking sheet with parchment paper.
Chop the chocolate bars into 1/2" pieces. They need to be about the same size so that they melt evenly. Do the same with the white chocolate bars, again cutting them into equal sized pieces so they melt evenly.
You'll need a double boiler to melt the chocolates. Or you can use a glass bowl that fits snugly in the top of a saucepan. Just make sure the bottom of the glass bowl will not touch the water that is on the bottom of the pan.
Place one inch of water in the bottom of the double broiler or saucepan. Set the pan over medium heat and allow it to start heating.
Place 2/3 of the semi-sweet chocolate into the top of the double boiler or in the glass bowl. Place the pan or bowl over the steaming water. Make sure that none of the water gets in the chocolate or it will seize up.
Stir the chocolate constantly as it melts. Continue to heat, melt and stir until the temperature of the chocolate reaches 110°–115°F. When the chocolate reaches this temperature, remove it from the heat and immediately stir in the remaining ⅓ of the chocolate. Stir until the mixture is completely smooth.
Pour the melted semi-sweet chocolate onto the prepared pan. Use a rubber spatula to spread the chocolate into a large rectangle. Try to make the chocolate as even as possible, and make it as thin or as thick as you'd like. I ended up with a rectangle that was about 12×15". Shake the pan slightly to even out the chocolate layer.
Repeat the chocolate melting process with the white chocolate. (Clean the pot or bowl quickly if you don't have a second one to use.)
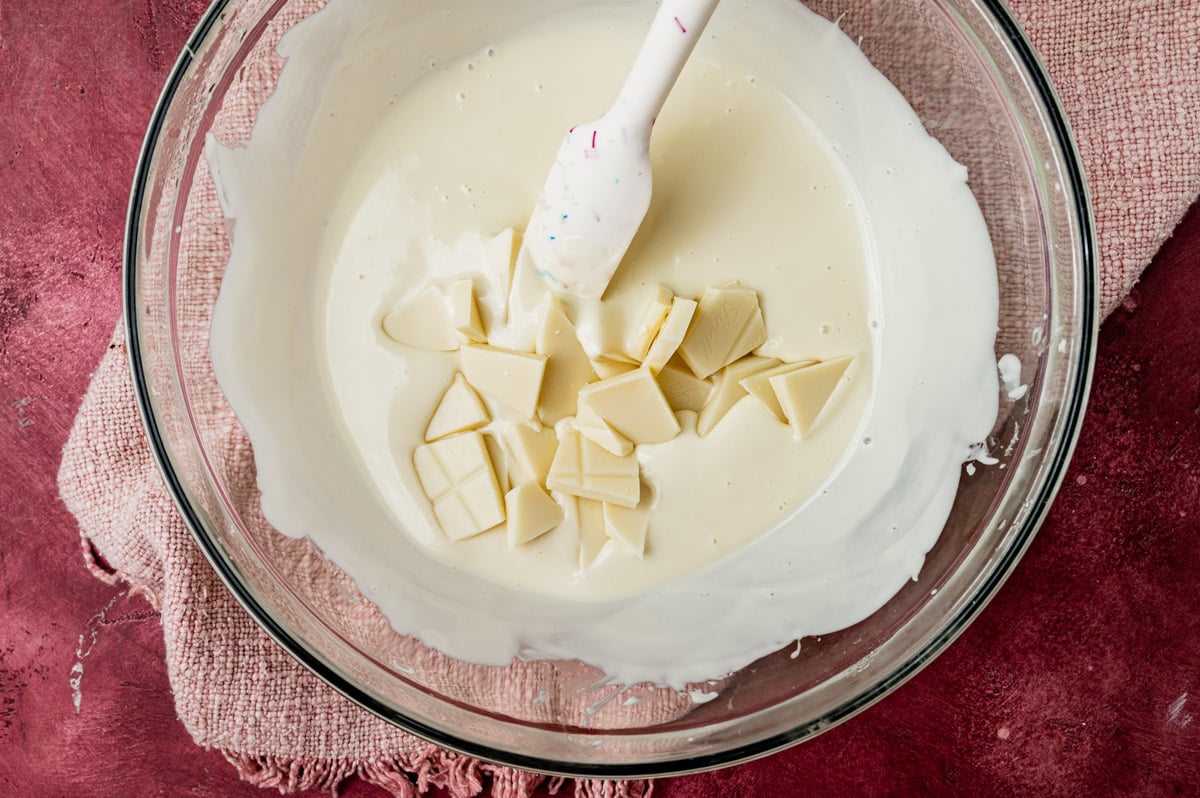
Place 2/3 of the white chocolate into the top of the double boiler or in the glass bowl. Place the pan or bowl over the steaming water.
Stir the white chocolate constantly as it melts. Continue to heat, melt and stir until the temperature of the chocolate reaches 110°–115°F. When the white chocolate reaches this temperature, remove it from the heat and immediately stir in the remaining ⅓ of the white chocolate. Then mix in the peppermint extract. Stir until the mixture is completely smooth.
Allow the white chocolate mixture to sit for about 3 minutes. Then pour it slowly and evenly over the semi-sweet chocolate. (The semi-sweet chocolate should not be set yet. You don't want it to set fully before adding the white chocolate. This will help the layers stick together.)
Use an offset spatula to lightly spread the white chocolate if needed, but I didn't have to do this much since when I poured it, it covered the chocolate nicely. Shake the pan slightly to make a smooth top. Immediately sprinkle the crushed candy canes on top of the white chocolate layer.
Allow the chocolate to set at room temperature. Letting the layers set slowly helps keep the layers from separating. The chocolate should take about 4 hours to set.
Cut the edges off the chocolate, then cut the peppermint bark into squares of the size you'd like.
Notes
Store in an airtight container at room temperature for 3 days. Refrigerate for up to 7 days. This also freezes well for up to 8 weeks.Refer to the article above for more tips and tricks.The calories shown are based on the peppermint bark being cut into 20 pieces, with 1 serving being 1 piece of bark. Since different brands of ingredients have different nutritional information, the calories shown are just an estimate. **We are not dietitians and recommend you seek a nutritionist for exact nutritional information. The information in the nutrition box are calculated through a program and there is room for error. If you need an accurate count, I recommend running the ingredients through your favorite nutrition calculator.**
I'm Julie Clark, CEO and recipe developer of Tastes of Lizzy T. With my B.A. in Education and over 30 years of cooking and baking, I want to teach YOU the best of our family recipes.
This sounds delicious and I will be making this for Christmas gifting. I read somewhere that someone had a problem with the bonding process and they scored the top of the bottom layer and the next layer adhered perfectly. Have a wonderful Christmas and thank you for sharing your recipes.


This sounds delicious and I will be making this for Christmas gifting. I read somewhere that someone had a problem with the bonding process and they scored the top of the bottom layer and the next layer adhered perfectly. Have a wonderful Christmas and thank you for sharing your recipes.