If you’ve ever wondered how to make sourdough starter without yeast, this is your complete guide! Traditional 7 day sourdough starter with perfect results, every time. It’s an easy recipe that takes just 5 minutes a day.
What do you do when your spring isn’t turning out anything like what you thought it would be? You bake bread. Because the aroma of freshly baked bread brightens even the longest, darkest days.
Sourdough starter is a “wild yeast” that bakers use in in place of commercial yeast. Throughout this sourdough starter making process below, flour and water will go through a fermentation process and grow naturally occurring bacteria and yeast that will give breads a beautiful rise.
Does sourdough really take a week?
Plan a week to get this sourdough active enough to rise a loaf of bread. Yes…a week seems like a long time, but it’s easy because it takes about 5 minutes a day. There are sourdough starter recipes with yeast if you want a “lazy” sourdough. This is how we make our sourdough discard focaccia!
Sourdough starter without yeast is 100% worth it. When you make your own sourdough starter, it’s so rewarding!
Two Tools Needed
There are two tools needed for the best results:
kitchen scale – Although you can measure by volume, for the best consistent results, investing in a kitchen scale. It’s worth it and will give a consistent hydration level.
sourdough jar – Glass jars hold sourdough beautifully. I love that they are glass so you can see the fermentation. They give lots of room for the starter to double. And they seal nicely when you need a break from baking bread.
Did you know?
Don’t store your sourdough starter in a metal container. Not all metal is created equally and acids react to metals. Use glass for the safest results.
Two Key Ingredients
It’s important to use unbleached flour and non-chlorinated water for sourdough starter.
Non-Chlorinated Water. Use filtered water since chlorine in tap water can kill the yeast as it tries to grow. Keep bottled water on hand.
Unbleached Flour. Bleached flour does not have as much natural yeast as unbleached flour does. I’ve had the most success with Meijer store brand unbleached flour. Please note that the first day you’ll need unbleached whole wheat flour, but the rest of the days use unbleached white flour. King Arthur unbleached flour is another good option.
How To Make Sourdough Starter
We’re going to talk about the sourdough process in days. Plan for 7 days to work with the sourdough. It won’t take long at all each day…less than 5 minutes after you get it going!
Here are our step-by-step instructions:
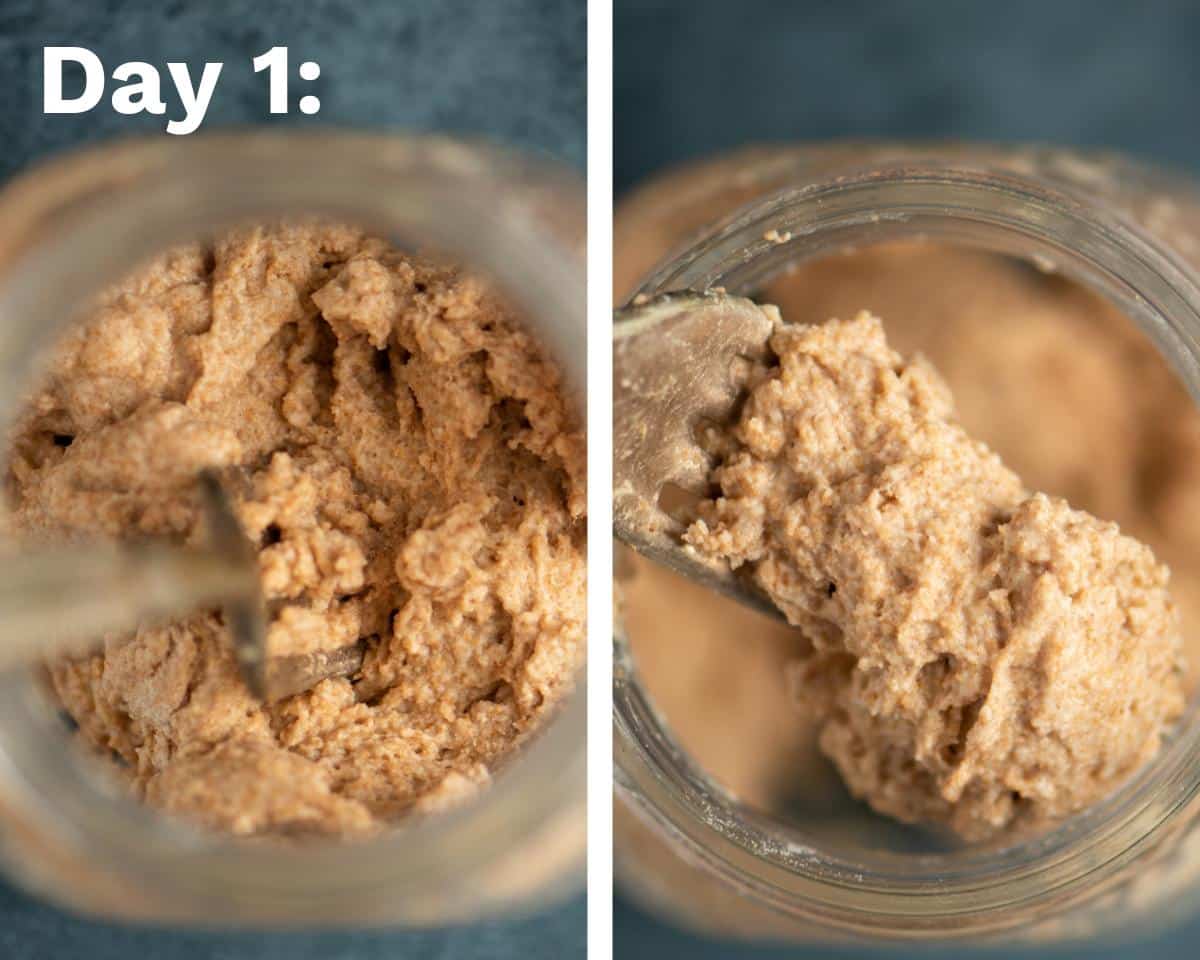
DAY 1:
Start with a clean glass jar, such as a pint size mason jar or weck jar. It should able to hold about 2 cups so that it can handle the rise of the starter.
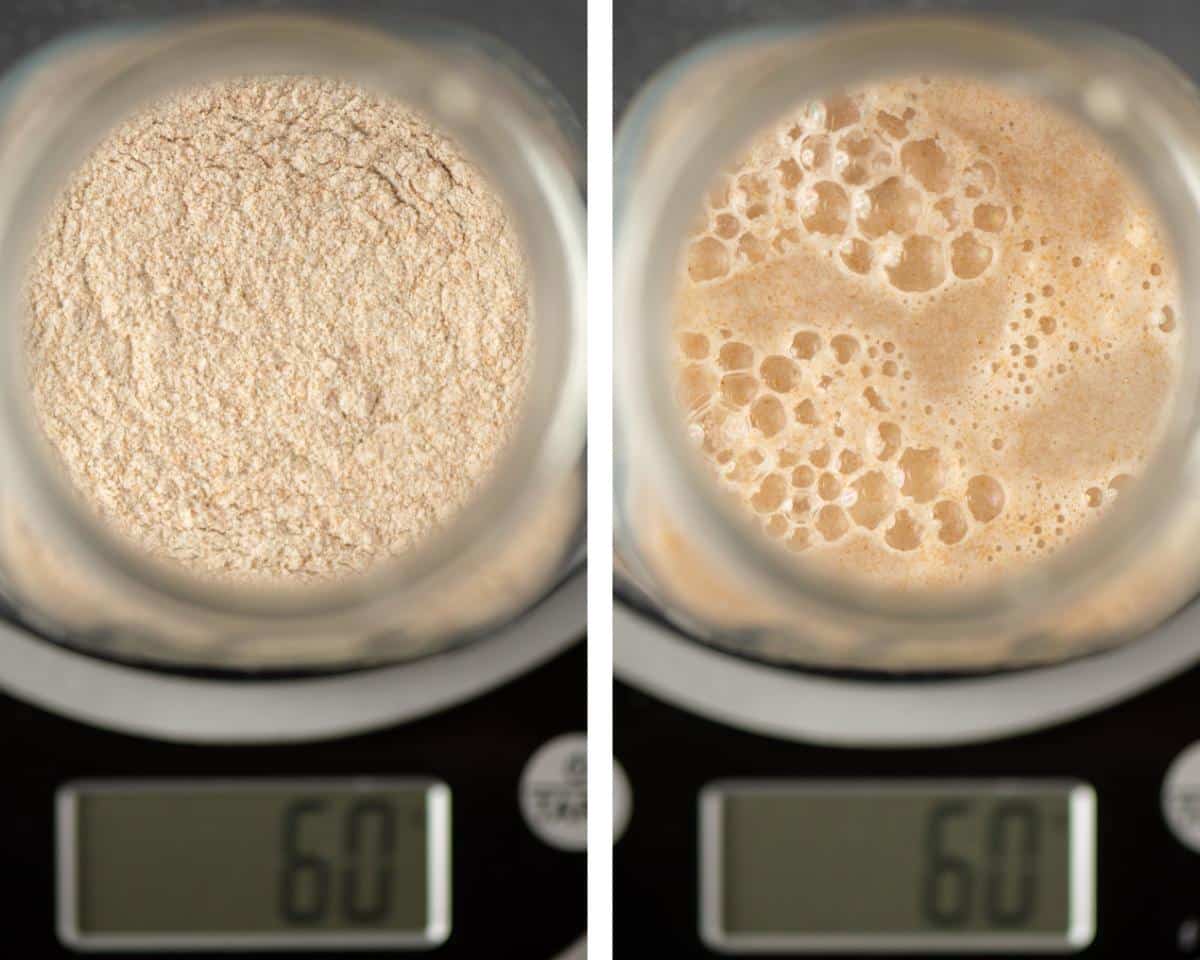
Place the jar on the kitchen scale. Turn the scale on and make sure it is reading 0 grams. If it isn’t, press the “tare” button to get the display to read zero.
Add 60 grams of unbleached whole wheat flour and 60 grams of warm, non-chlorinated water. The mixture will be very, very think. It won’t be impressive at all to start. But just wait. 🙂
Cover the jar loosely with plastic wrap and let it sit on the kitchen counter at room temperature, or in a slightly warm place, rather than cool.
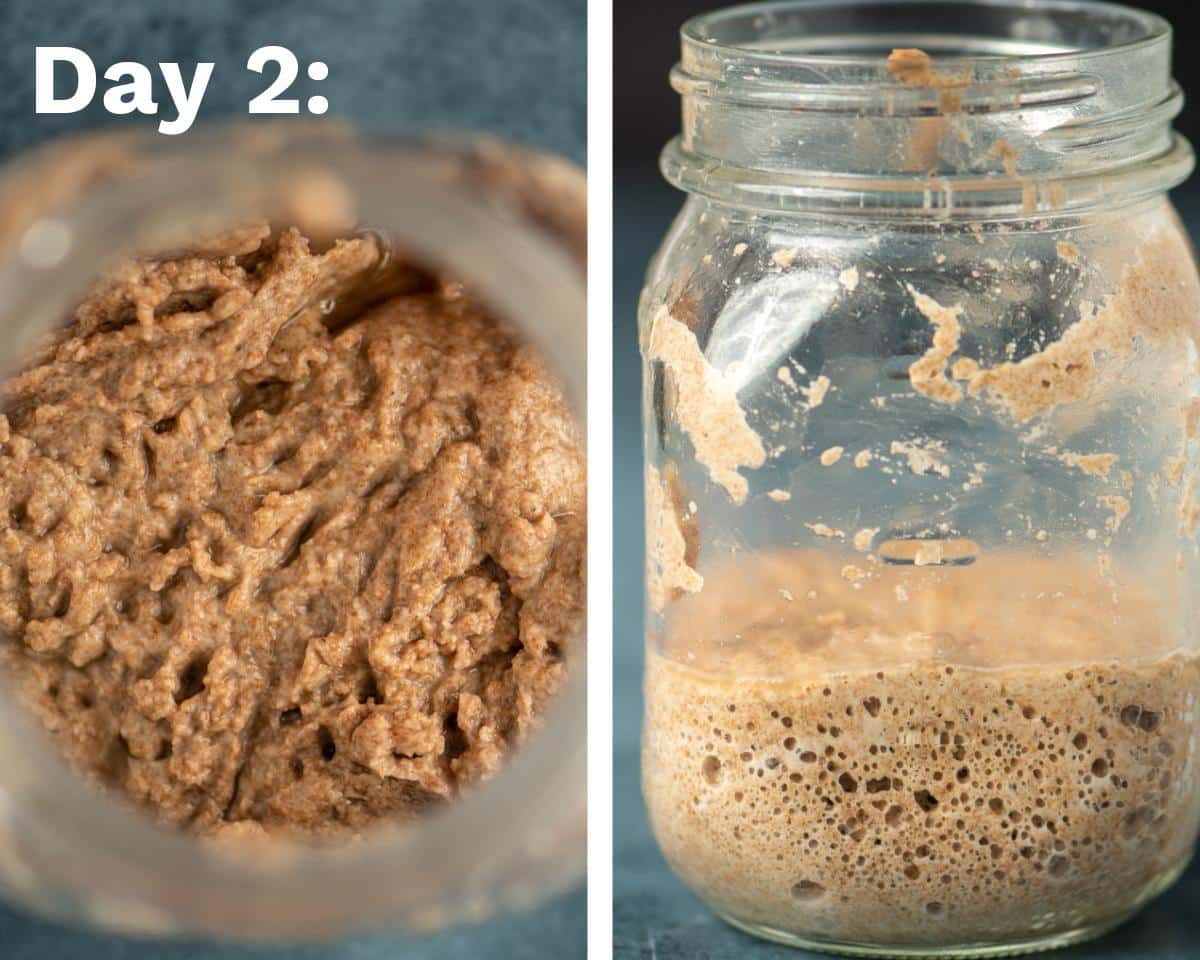
DAY 2:
Check the starter. You’re looking for bubbles to form. If you don’t see any, it is ok because they come and go fairly quickly.
Don’t mix it. Just check it, then let it sit again for another 24 hours.
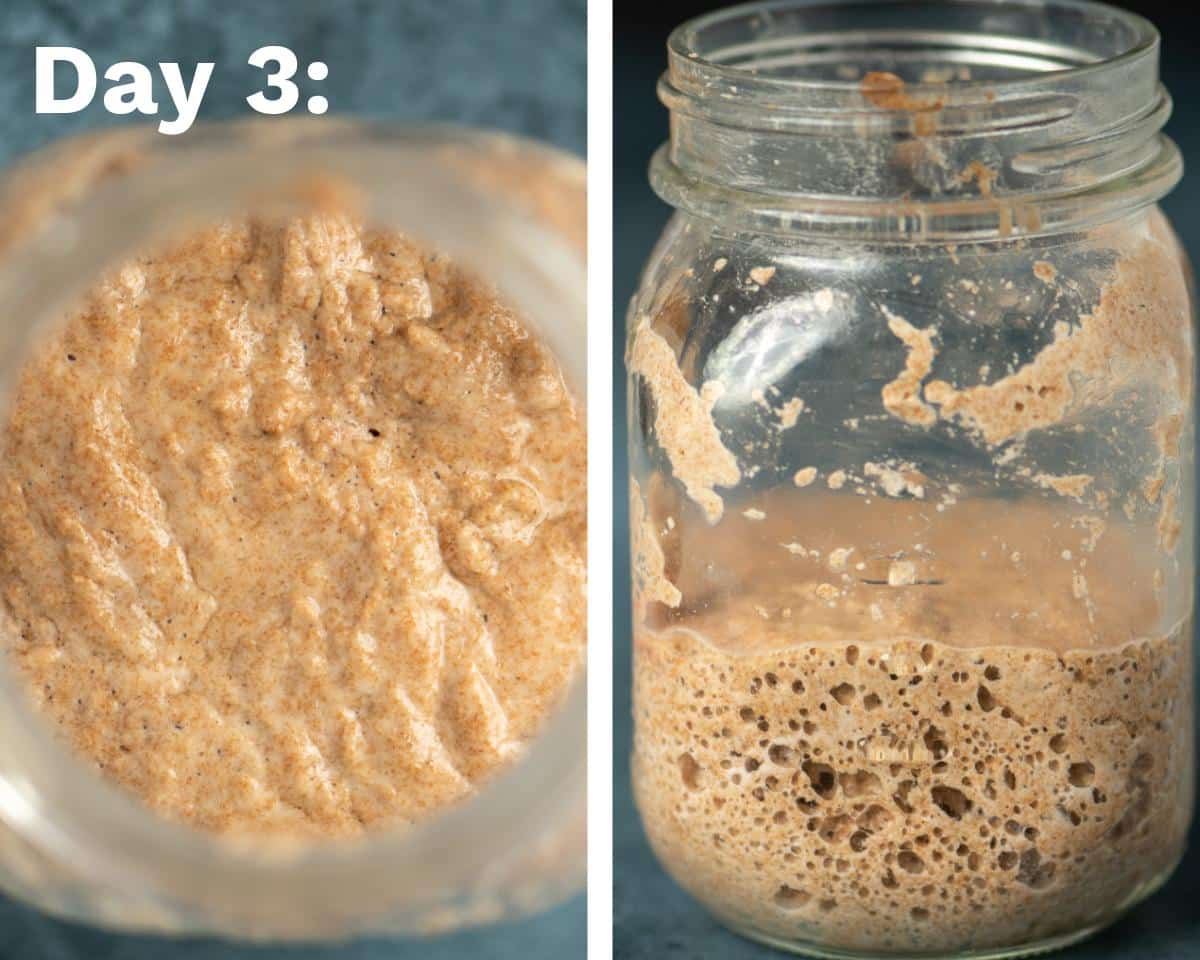
Day 3.
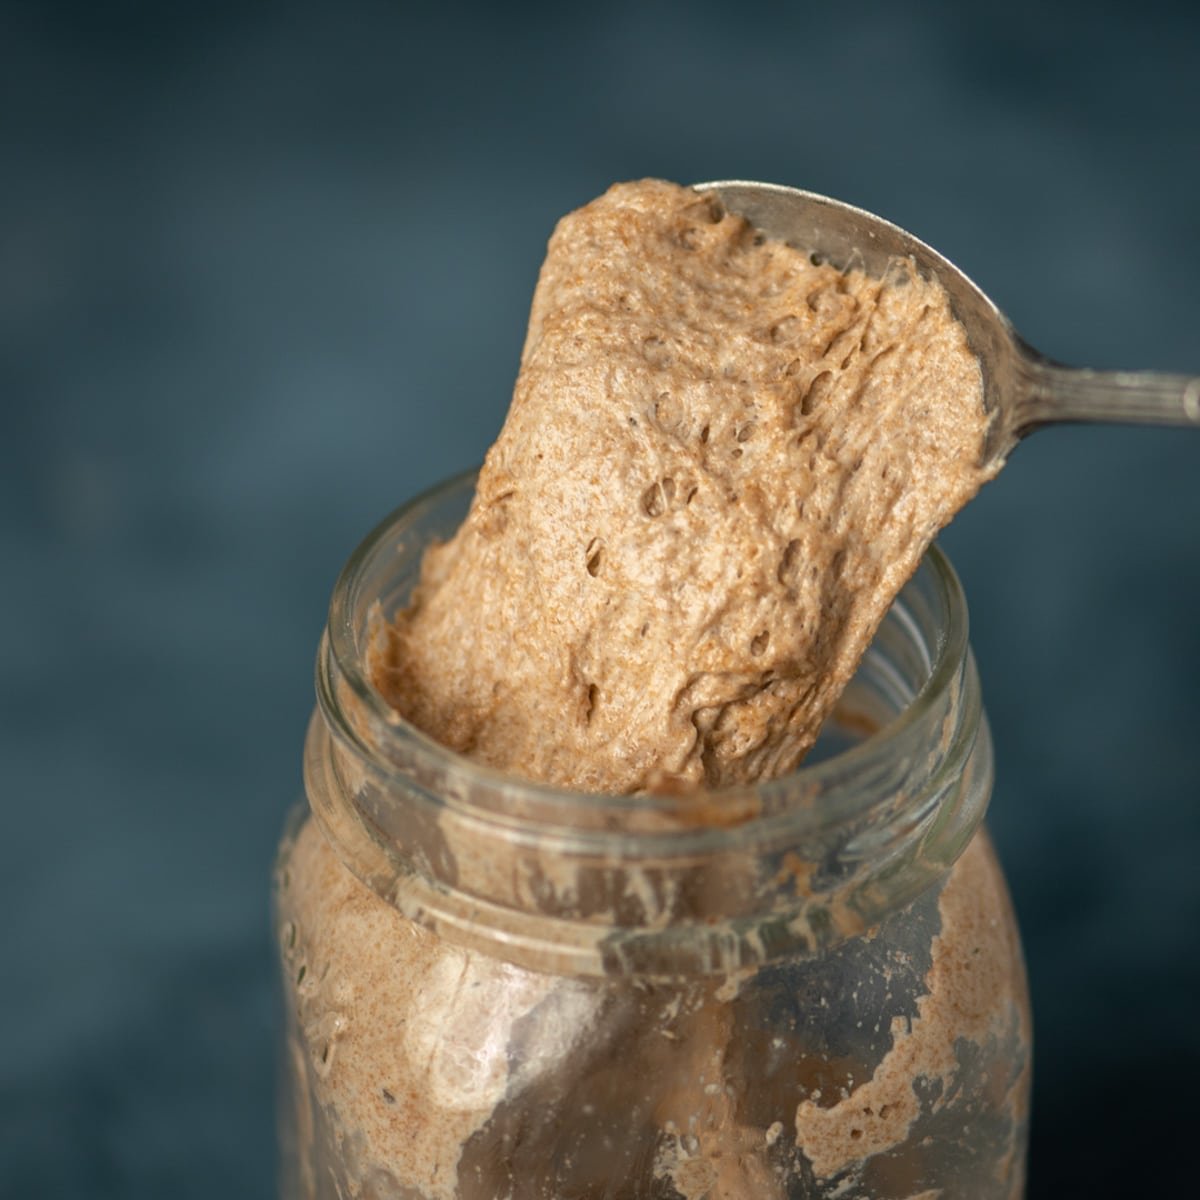
This is the first day you’ll feed the starter. Feed it no matter what it looks like. At this point the starter is going to be “stretchy”.
Pull out half of the starter and throw it away. Use your kitchen scale to again add 60 grams of all purpose, white, unbleached flour (remember…you only use whole wheat that first day) and 60 grams of warm water to the remaining starter. Always use equal parts flour and water.
Mix it all together. It will still be really thick. Cover loosely with plastic wrap.
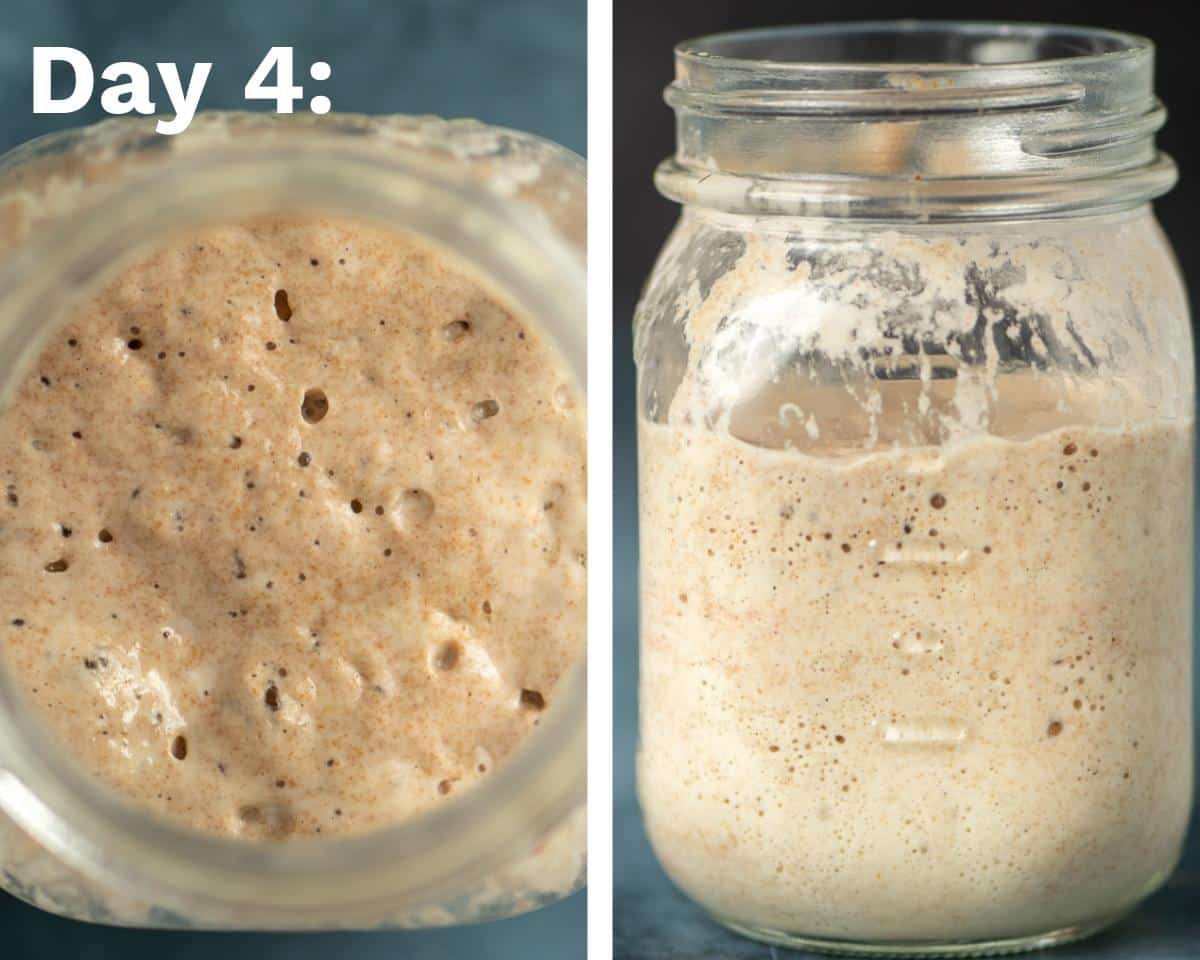
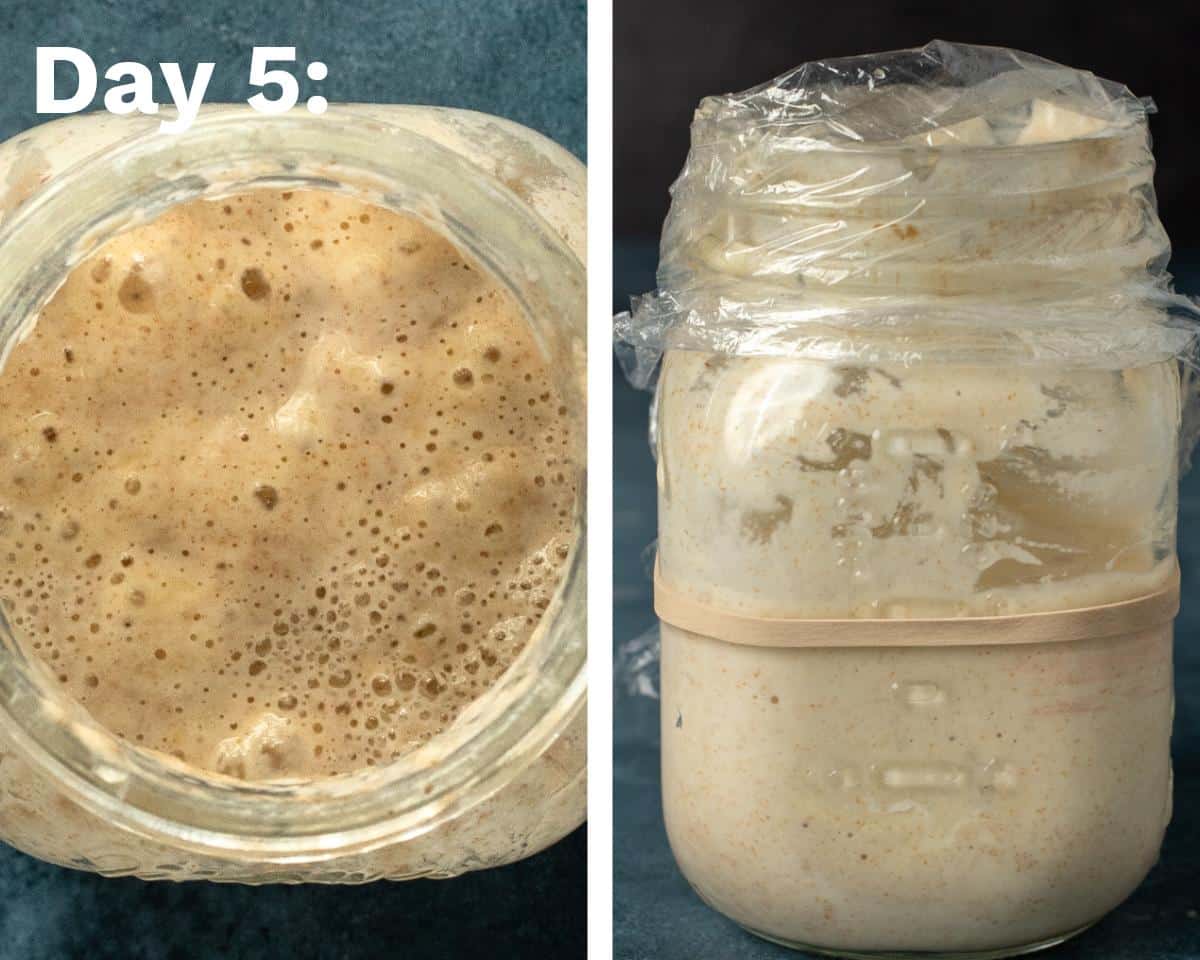
Day 4, 5, and 6.
Discard half of the starter and feed as you did in Day 3. You’ll do the same thing each day no matter what the starter looks like. Discard half, and feed with equal amounts of flour and warm water.
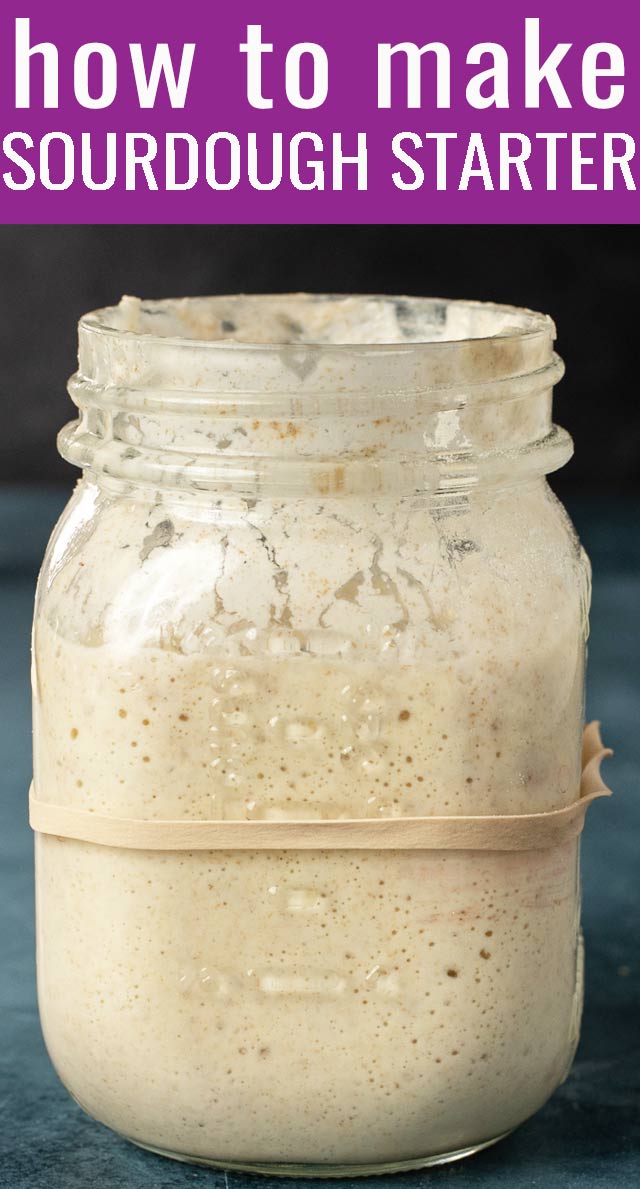
As these three days pass you’ll notice a natural rise and fall to the starter. This is an important process to observe because it will help you learn you when the starter is ready to bake with and when it is hungry. You can use a rubber band (or a piece of tape) on the jar to mark where the starter is when you feed it, then how it doubles as the starter grows.
Day 7.
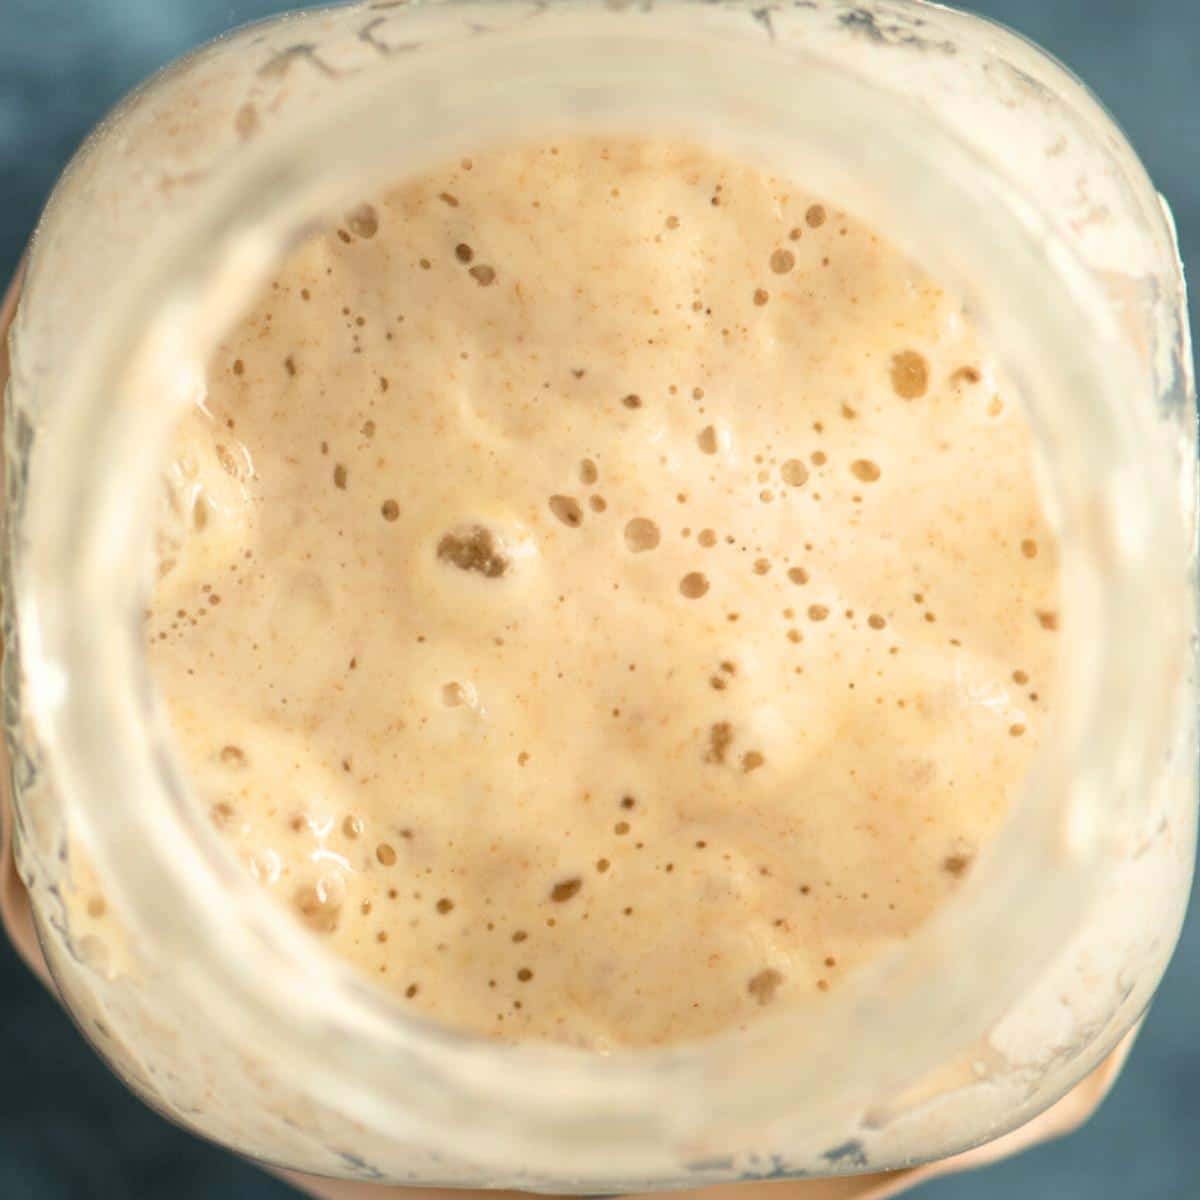
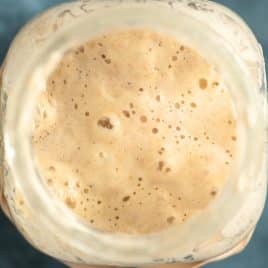
Your new starter should have lots of bubbles and you are almost ready to bake! A healthy starter should look light and airy and have a sweet and tangy aroma. It should not be a sharp or harsh smell.
When your starter looks like this, it means it is ready to start baking the baking process!
If your starter does not look like this, you might want to continue the feeding process for a few more days before using it. This can happen often in cooler temperatures.
When is starter ready to bake with?
Starter is ready when it is bubbly and in the “doubled” stage. This is called an “active sourdough starter”. If you are wanting to bake bread and the starter is “deflated”, feed the starter, wait a couple of hours and it should be doubled and ready to bake with.
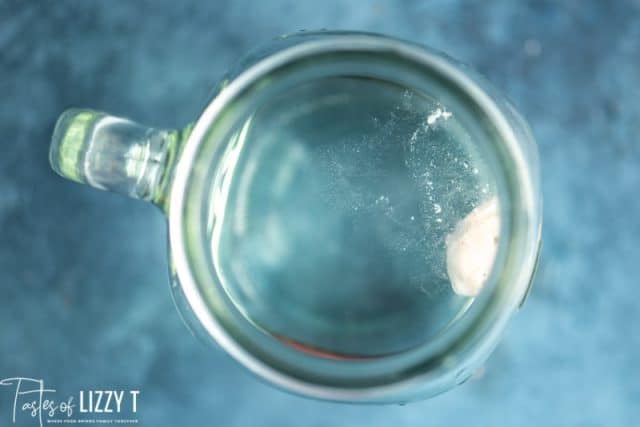
TRY THE FLOAT TEST
Drop a little bit of starter into a glass jar. If the starter floats, it is ready to bake with. See the picture below.
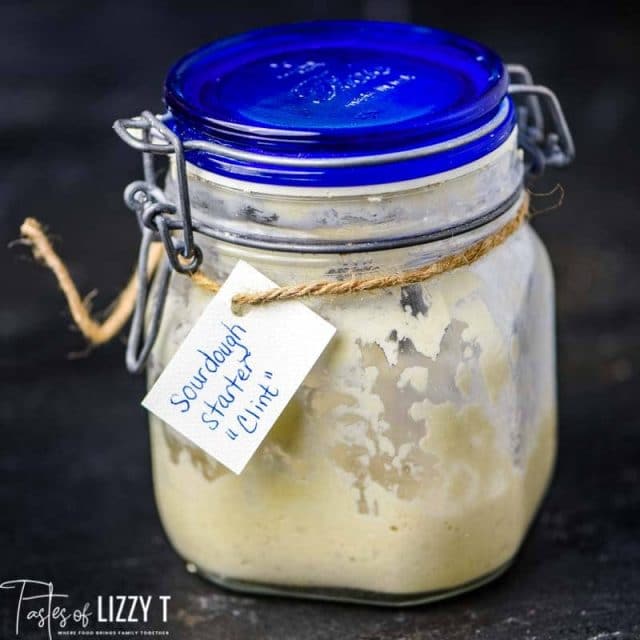
And for fun…name your starter!
Once you have your homemade sourdough starter it’s time to name it! We named ours Clint. You know…for “Clint Yeastwood”. 🙂 Have fun with it!
Feeding Schedule
If you are storing your starter at room temperature, you’ll need to feed it daily. Depending on how much you keep, you can discard about half the starter (use it in sourdough pancakes or sourdough discard cinnamon rolls) and feed it equal amounts of the unbleached all-purpose flour and non-chlorinated water.
If you don’t use your sourdough often, seal it and store it in the refrigerator. Feed it weekly with equal amounts of flour and water. There will be a cloudy liquid on top of the starter. That is called “hooch” and it means your starter is hungry. Stir that liquid in, then feed. Do this weekly. I like to set a reminder on my phone to go off once a week. That way I always have starter on hand.
Once your sourdough is refrigerated, be sure to remove it from the fridge 12-24 hours before you are ready to bake. Mix it, feed it, then watch for it to bubble. If it doesn’t bubble, discard half of the starter and feed again with equal amounts of water and flour.
You’ll learn the timing of your own starter and know how long it takes to get it bubbly and active after a few times.
Replenish your starter after you’ve used some up by adding 25 to 50 grams of flour and an equal weight of water to keep at least ¼ cup of starter.
If you have an active starter, it’s so easy to quickly grow more sourdough if you’re needing a large amount. There is no need to keep huge amount of it in your refrigerator.
And that’s about it! Please share your hints for making sourdough. What have you had success with? I know many of you are pros and can help me along my sourdough journey!
What do I do with the daily discards?
Discard recipes use a leavening agent (baking powder, baking soda or yeast) to get a rise in the baked good. See some of our favorite recipes using sourdough discard here:
If you've ever wondered how to make sourdough starter without yeast, this is your complete guide! Traditional 7 day sourdough starter with perfect results, every time. It's an easy recipe that takes just 5 minutes a day.
Start with a clean glass jar. I use a pint size mason jar when I am beginning a starter, but a weck jar or other glass jar will be fine too. You’ll just want it to be able to hold about 2 cups so that it can handle the rise of the starter.
Place the jar on the kitchen scale. Turn the scale on and make sure it is reading 0 grams. If it isn’t, press the “tare” button to get the display to read zero.
Add 60 grams of whole wheat flour and 60 grams of warm, non-chlorinated water. The mixture will be very, very think. It won’t be impressive at all to start.
Cover the jar loosely with plastic wrap and let it sit at room temperature, of in a spot where the room temperature is slightly warmer.
Day 2.
Check the starter. You’re looking for bubbles to form. If you don’t see any, it is ok because they come and go fairly quickly. Don’t mix it. Just check it, then let it sit again for another 24 hours.
Day 3.
This is the first day you’ll feed the starter. Feed it no matter what it looks like. At this point the starter is going to be “stretchy”. Pull out half of the starter and throw it away. Use your kitchen scale to again add 60 grams of all-purpose unbleached flour and 60 grams of warm water.
Mix it all together. It will still be really thick. Cover loosely with plastic wrap.
Day 4, 5, and 6.
Discard half of the starter and feed as you did in Day 3. You’ll do the same thing each day no matter what the starter looks like. Discard half, and feed with equal amounts of flour and warm water.
As these three days pass you’ll notice a natural rise and fall to the starter. This is an important process to observe because it will tell you when the starter is ready to bake with and when it is hungry. You can use a rubber band (or a piece of tape) on the jar to mark where the starter is when you feed it, then how it doubles as the starter grows.
Day 7.
Your starter should be very bubbly and you are almost ready to bake! It should have a sweet and tangy aroma. It should not be a sharp or harsh smell. It should look light and airy.
If your starter does not look like this, continue the feeding process for a few more days before using it.
Once your starter is light and airy, it's time to bake with it! Place the active starter in a clean jar that it will continue to live in as you feed it.
I'm Julie Clark, CEO and recipe developer of Tastes of Lizzy T. With my B.A. in Education and over 30 years of cooking and baking, I want to teach YOU the best of our family recipes.
I make my first loaf last week, it was everything I hoped for! My question is…it’s time to feed the starter that I refrigerated. Do I still discard 1/2 of the original? Do I immediately put it back in the fridge after I have fed it?
Brenda Gess
1 month ago
I’m on Day 6 of starter recipe. Once I get to day 7?and prepare to bake, the recipe doesn’t tell me how to keep the starter alive for future uses. Please advise!
Jeremy Wilson
1 year ago
Do you have to discard or can you just feed it to have more on hand?
john lake
1 year ago
Julie thanks for the starter recipe. I have baked for most of my life even for 8 years in the military but have never baked sour dough bread. I am going to make some Pain de Champagne bread and so I need a starter. I will let you know how it works out in a week or so. John
Melinda
2 years ago
Why, on day 2 of making my starter did it explode out of my jar?
Miriam
3 years ago
I’m so happy to find this recipe. So far it’s the only one that seems to be working for me. I have a quick question. I’m on day 3. When can I start using the discard in recipes?
Danielle E
3 years ago
My starter is turning pink, on day two. What did I do wrong?
Kim
3 years ago
I am on day 8, I still do not have a doubled rose on the starter, and barely any bubbles. I’m weighing everything. I cannot figure out what I’m doing wrong. I’m following everything on the recipe to a T. I’m doing everything the exact same time in the morning. I’m using good quality water, warm not hot. Help!!!!!
Becky Wilkins
4 years ago
How much is 60, 300, 360 Grams. Could you break it down to cup, 1/2 cup, 2 cups. etc.???
Mike C
4 years ago
When I was a little kid, my mother always made sourdough bread for the family and was so good. I remember watching her in the kitchen feeding the bread, kneeling in prep for baking. Does any one have any old time recipes of the exact ingredients to use? I would like to take a stab at making sourdough bread as we had it when I was a kid. If you would like to share those ingredients I would be most appreciative. Thanks so much!
MC
Janey
4 years ago
Hi Julie, why is whole wheat only used on day 1? May I continue to feed with whole wheat on day 3 and then subsequently a mixture of whole wheat + white?


I make my first loaf last week, it was everything I hoped for! My question is…it’s time to feed the starter that I refrigerated. Do I still discard 1/2 of the original? Do I immediately put it back in the fridge after I have fed it?
I’m on Day 6 of starter recipe. Once I get to day 7?and prepare to bake, the recipe doesn’t tell me how to keep the starter alive for future uses. Please advise!
Do you have to discard or can you just feed it to have more on hand?
Julie thanks for the starter recipe. I have baked for most of my life even for 8 years in the military but have never baked sour dough bread. I am going to make some Pain de Champagne bread and so I need a starter. I will let you know how it works out in a week or so. John
Why, on day 2 of making my starter did it explode out of my jar?
I’m so happy to find this recipe. So far it’s the only one that seems to be working for me. I have a quick question. I’m on day 3. When can I start using the discard in recipes?
My starter is turning pink, on day two. What did I do wrong?
I am on day 8, I still do not have a doubled rose on the starter, and barely any bubbles. I’m weighing everything. I cannot figure out what I’m doing wrong. I’m following everything on the recipe to a T. I’m doing everything the exact same time in the morning. I’m using good quality water, warm not hot. Help!!!!!
How much is 60, 300, 360 Grams. Could you break it down to cup, 1/2 cup, 2 cups. etc.???
When I was a little kid, my mother always made sourdough bread for the family and was so good. I remember watching her in the kitchen feeding the bread, kneeling in prep for baking. Does any one have any old time recipes of the exact ingredients to use? I would like to take a stab at making sourdough bread as we had it when I was a kid. If you would like to share those ingredients I would be most appreciative. Thanks so much!
MC
Hi Julie, why is whole wheat only used on day 1? May I continue to feed with whole wheat on day 3 and then subsequently a mixture of whole wheat + white?