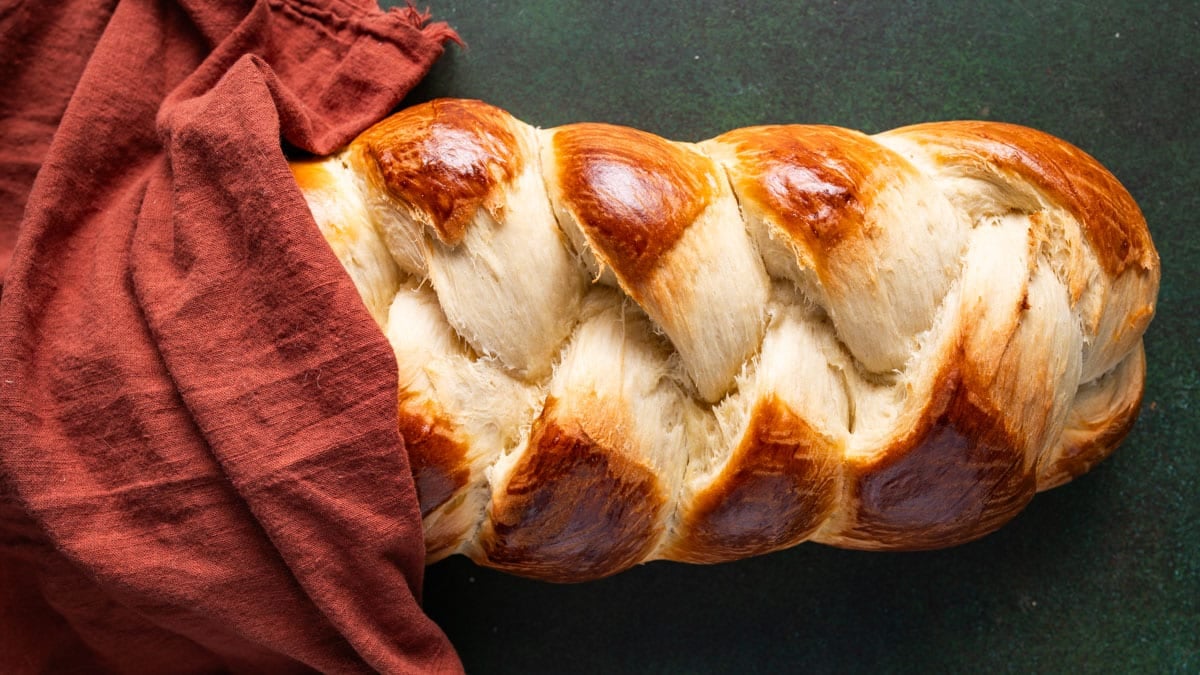
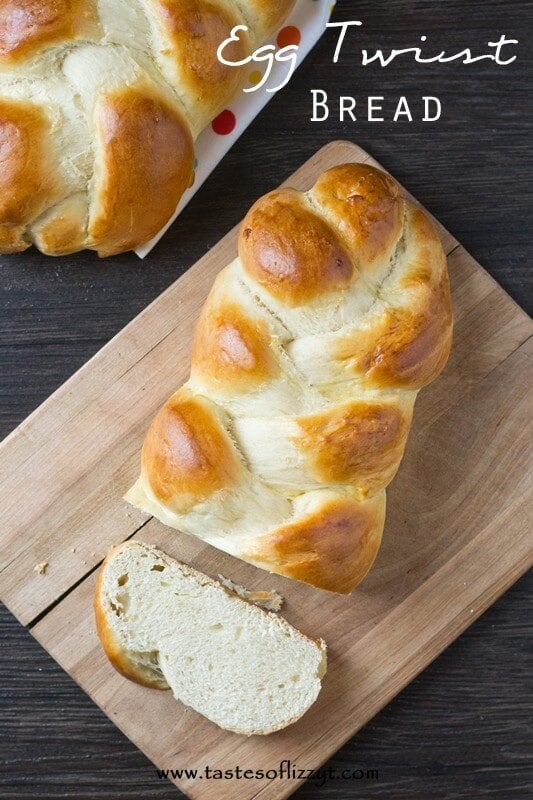
This Egg Twist Bread is a beautiful and impressive loaf of bread to serve to guests. An egg wash gives the top of this soft bread a nice golden look, just like with our milk bread.
I took our homemade cinnamon roll dough and made the most amazing braided bread loaf. This is not a true brioche or challah dough since it is based on our cinnamon roll recipe that uses milk, but the twisted egg bread is our version of those classic bread recipes.
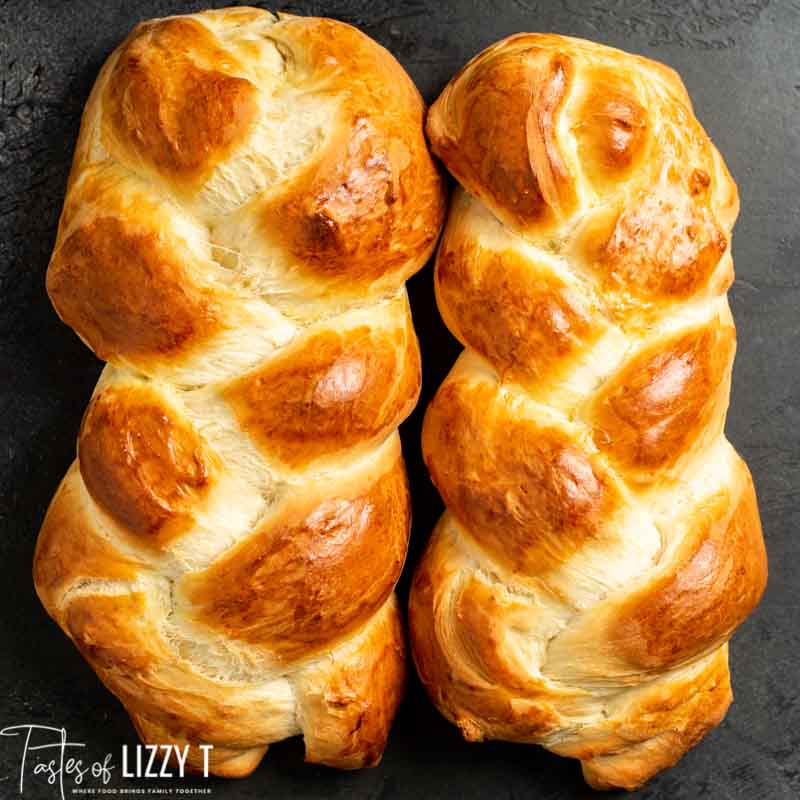
If you’ve ever wanted to make a beautiful golden brown loaf of bread, this is the recipe you need. It’s popular as an Easter bread, but easy enough for any time of year. We even turned it into a cinnamon crunch braided loaf!
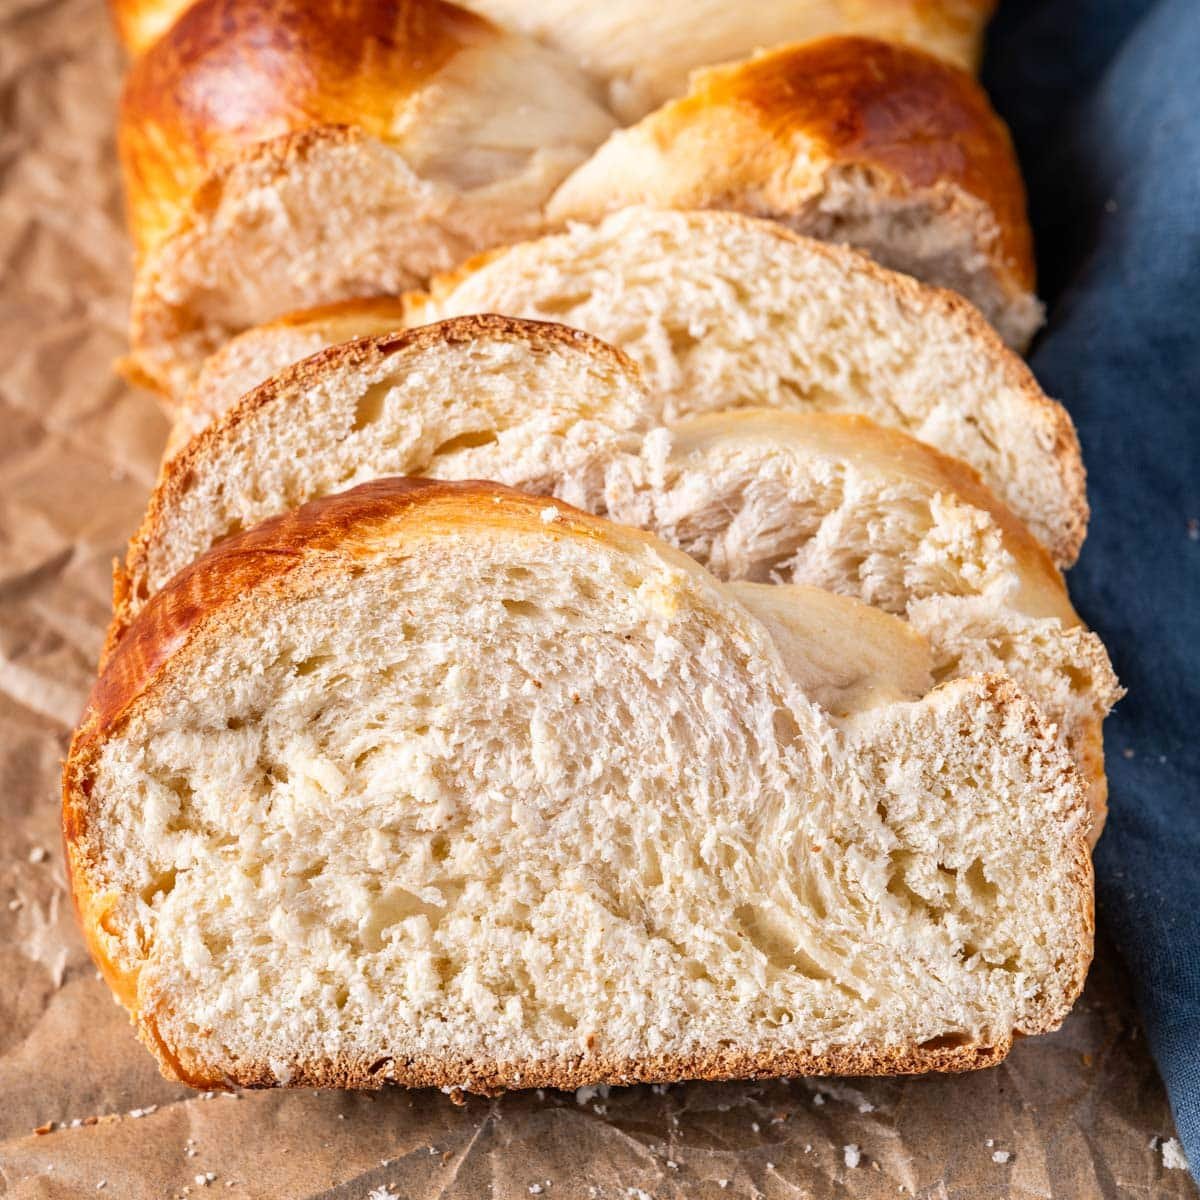
Eat this bread fresh from the oven and your life will never be the same.
My grandma was cleaning out her old fashioned books and gave me a huge stack of old church cookbooks. I don’t know if you’ve ever looked through an old church cookbook, but they contain quite the collection of recipes. I felt like I had hit the jackpot!
This bread is so irresistible it comes with a few inside jokes that are for our family’s ears only to protect the innocent, but just know that you’ll have a hard time resisting a slice of this bread right from the oven.
I make the dough in our bread machine so keep prep quick and easy. You can always knead by hand or also with a stand mixer.
Get the milk to the perfect temperature to allow the yeast to activate. If you have a thermometer, it should measure 115ºF. Our favorite yeast is Red Star Yeast. It works like a charm every time!
Add the flour slowly. Start with 4 cups of flour and add the last ½ cup of flour a tablespoon at a time only if you need it.
Kneading the dough. Knead the dough in the stand mixer with the dough hook for about 5-7 minutes. Knead by hand if you’d like. The dough is super easy to work with! Be careful not to add too much flour during kneading or your bread will be dry. Your dough should feel sticky, but not stick to your hands. For those of you who have bread machines, this dough mixes beautifully in there too. Add the ingredients in the order that the machine manufacturer suggests. Mine starts with liquids and ends with flour and yeast on top.
Brush the tops with a beaten egg. Don’t skip this step! The egg wash is what gives the bread such a lovely golden color. Allow it to rise for another 20-30 minutes while the oven is preheating. If it doesn’t rise much the second time, it’s ok. The egg twist bread will spring up in the oven.
Egg Twist Bread
4.75 from 36 votes
This Egg Twist Bread is a beautiful and impressive loaf of bread to serve to guests. An egg wash gives the top of this soft bread a nice golden look.
Add the warmed milk to the bowl of a stand mixer. The milk temperature should be about 115ºF. Sprinkle the yeast over the milk. Let it sit for 2-3 minutes so that it gets a little frothy. 1 cup 2% milk, 1 package instant yeast
Add in the sugar, eggs and butter. With the paddle attachment, stir on low speed for a few seconds until combined. ½ cup granulated sugar, 2 large eggs, ½ cup salted butter
Add in the salt and 4 cups of flour. Use the paddle attachment to mix the dough just until combined. Let the dough rest for 5 minutes. ½ teaspoon salt, 4 ½ cups all-purpose flour
Switch to the dough hook and knead the dough on low speed for 5-7 minutes. Add in the last ½ cup flour slowly, only if needed. The dough should still feel slightly tacky to the touch. It will pull away from the sides of the bowl but may stick a little to the bottom. If you add too much flour, your bread will be dry, so only add the last ½ cup if needed!
Place this dough in a greased bowl and cover it with plastic wrap or a towel. Allow the dough to rise in a warm place until it has nearly doubled, about 30-45 minutes.
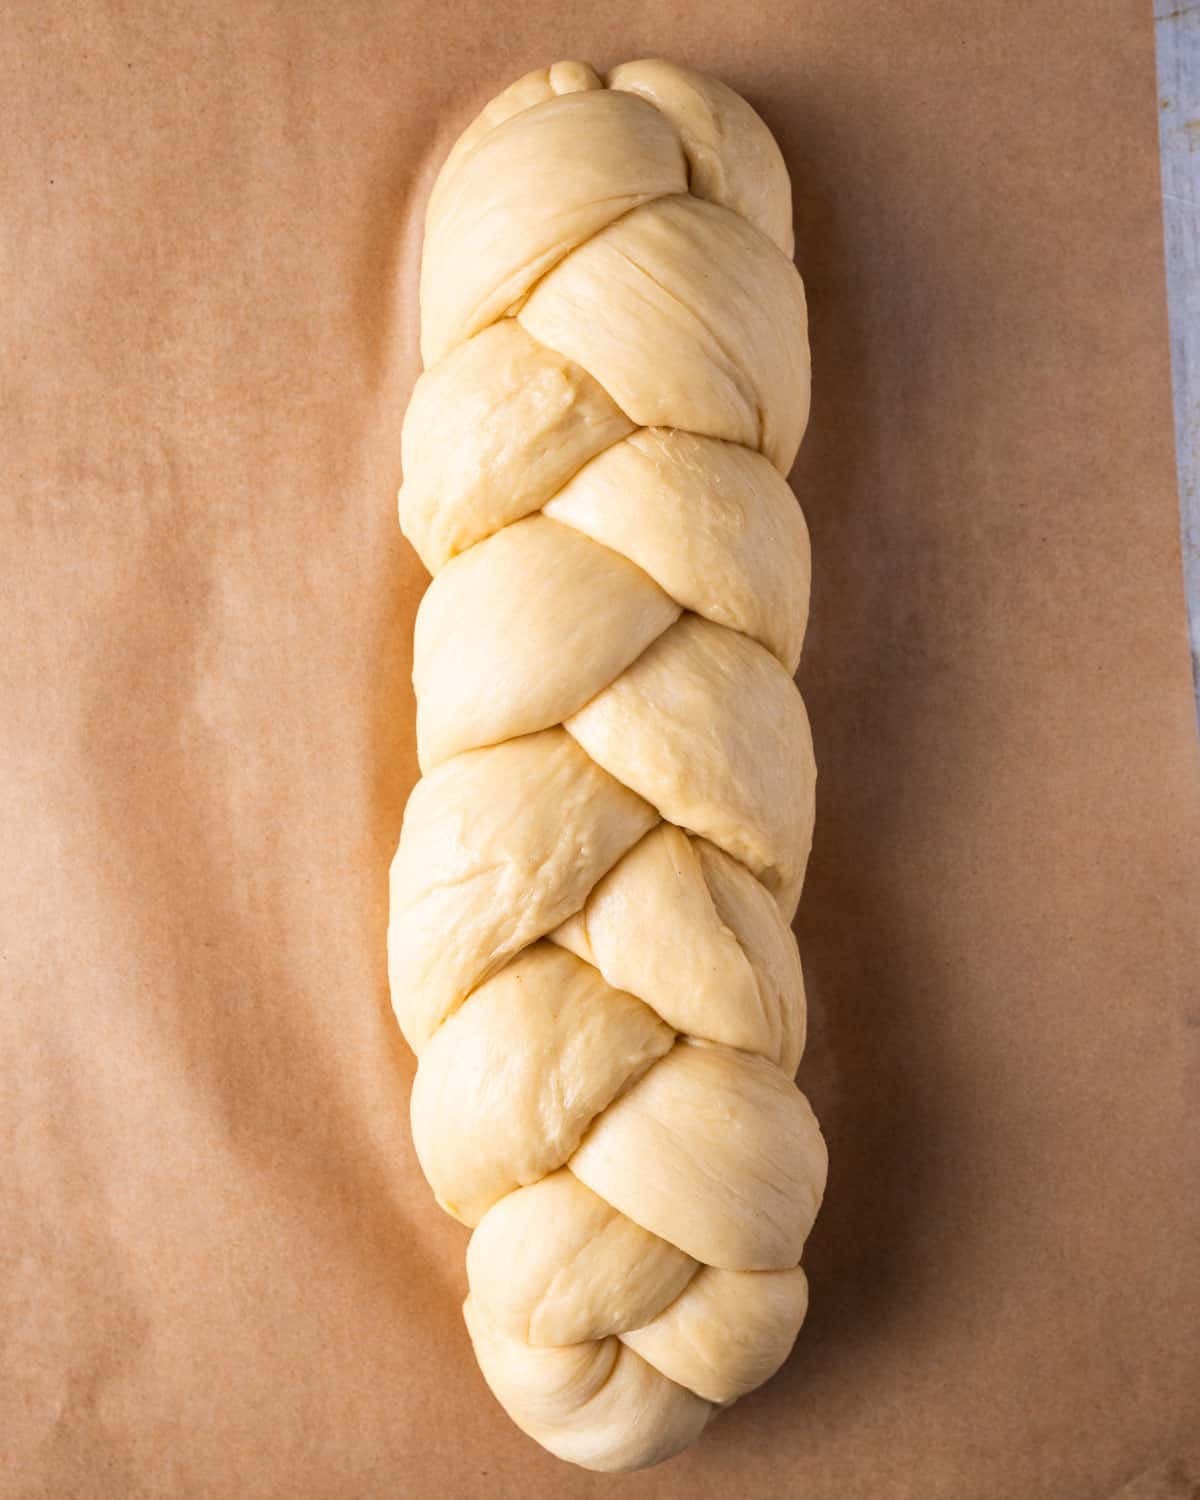
To make the braids, split the dough into two balls on a lightly floured surface, then split each ball into three pieces. Roll those 3 pieces out into a snake about 12" long. Braid the three ropes together and tuck/pinch the ends so that the braid does not come undone. Place each braid on a greased baking sheet or a sheet lined with parchment paper.
Beat the remaining egg and brush the tops of the loaves with this. This is what gives the bread such a lovely golden color! Allow the dough to rise for another 20-30. minutes.
Preheat the oven to 350ºF while the bread is doing its second rise. Bake the for 20-25 minutes or until golden brown. 1 large egg
Notes
Refer to the article above for more tips and tricks.The calories shown are based on the bread being cut into 20 pieces, with 1 serving being 1 slice of bread. Since different brands of ingredients have different nutritional information, the calories shown are just an estimate. **We are not dietitians and recommend you seek a nutritionist for exact nutritional information. **
Yes! This egg twist bread recipe can be completely made a day in advance and stored in an airtight container at room temperature. It will also freeze well for up to 6 weeks.
Another option is to shape the bread, then cover and refrigerate overnight so it does a slow rise in the fridge. Remove it from the fridge and bake according to the recipe.
Egg Twist Bread
About Julie Clark
I'm Julie Clark, CEO and recipe developer of Tastes of Lizzy T. With my B.A. in Education and over 30 years of cooking and baking, I want to teach YOU the best of our family recipes.


I swapped out (a little less) honey for sugar and it still worked out. I was happy to find a recipe that didn’t make two loaves- thank you!
I am allergic to cows milk, so I buy soy milk. Can I use that in this recipe?