Julie Clark
Posted:
At the Family Table!
Posted:
May contain affiliate links. Terms of Use Policy.
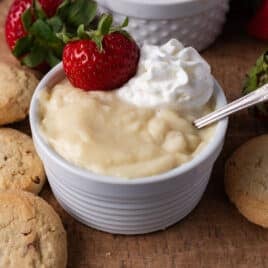
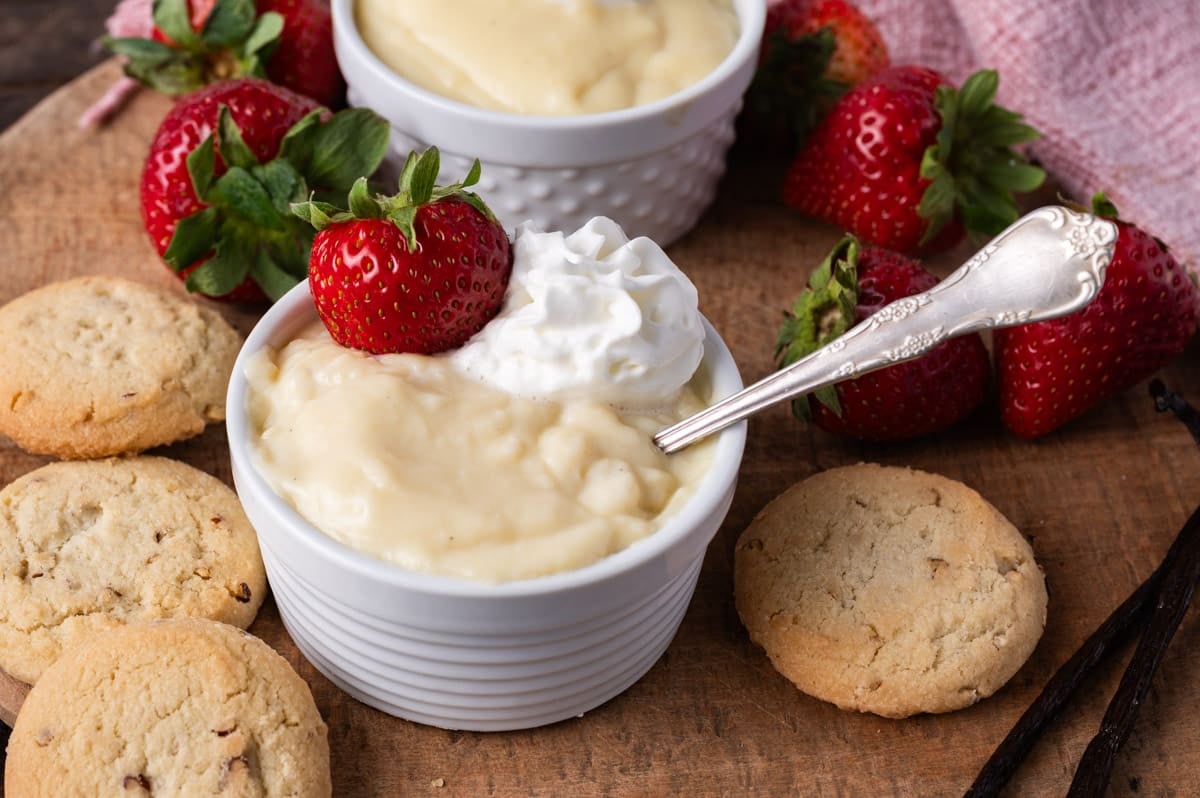
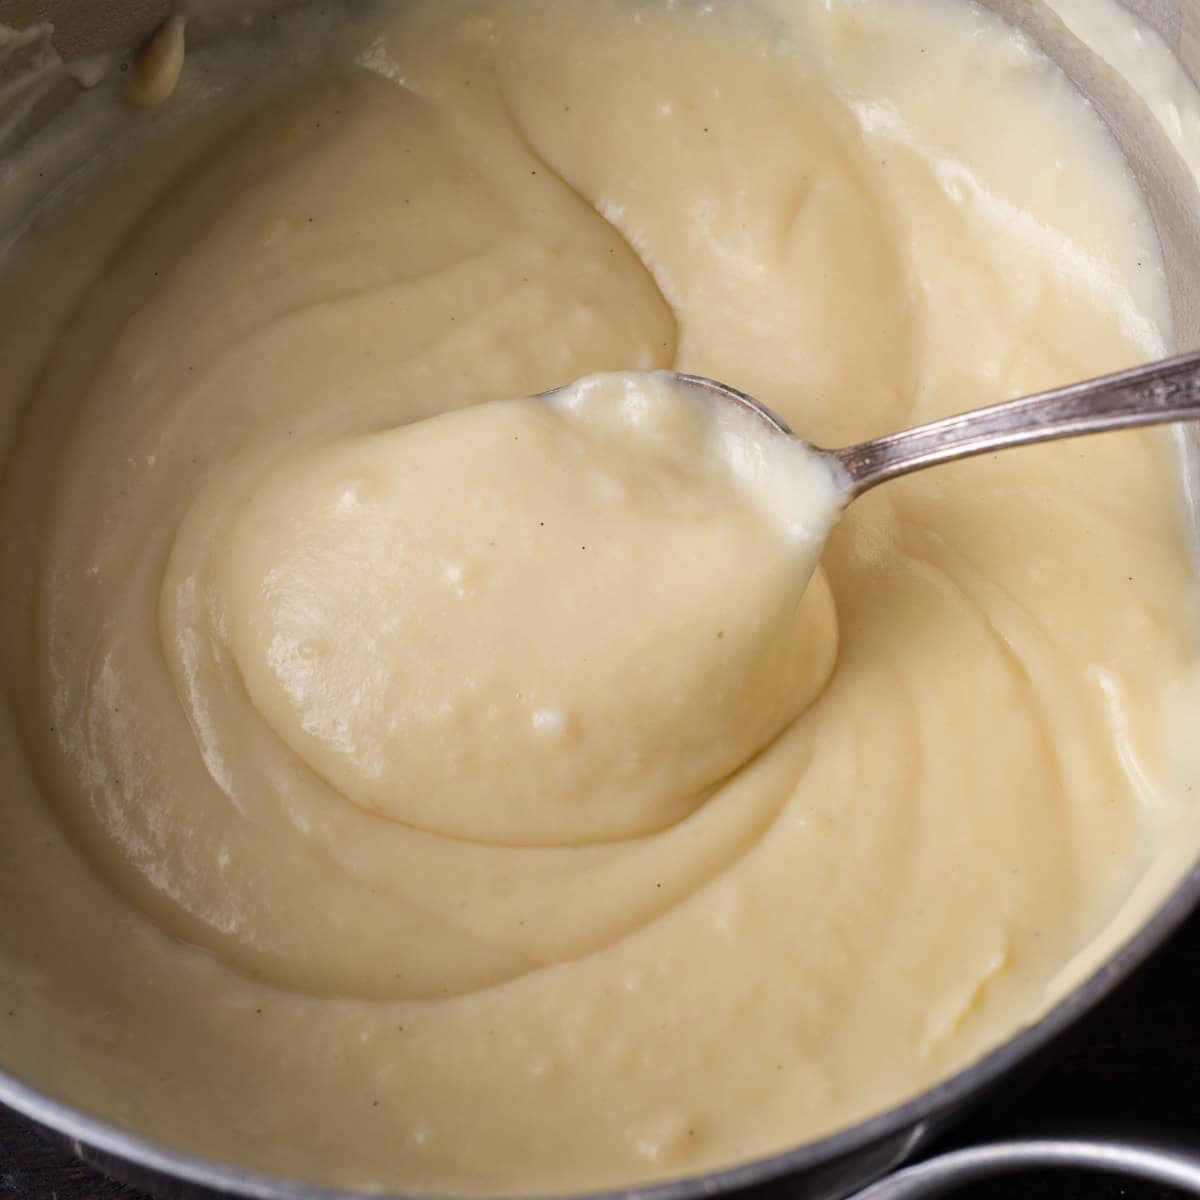
Skip the box mix! This homemade vanilla pudding comes together in one saucepan in about 20 minutes using pantry staples you already have. It’s thick, creamy, and lightly sweetened. It’s a true old fashioned vanilla pudding made from scratch. Try it in our old fashioned banana pudding or punch bowl cake!

Matt loves pudding. I mean really loves it. It’s the kind of thing that comes up in family food stories at almost every holiday gathering. And today I’m sharing the homemade vanilla pudding recipe that I’ve made him for the past 28 years.
What I love most about this particular recipe is how intentionally simple it is. It uses whole eggs instead of just egg yolks, which gives it a slightly different texture than what you’ll find most recipes online. And the sugar level is kept minimal on purpose. It’s a base pudding that is super creamy enough to eat straight, but also not to sweet to add fresh berries, whipped cream, or crumbled cookies.
If you’ve ever thought homemade pudding was fussy or unreliable, I promise this recipe will change your mind. One saucepan, a whisk, and about 20 minutes. That’s it.
Check out our tapioca pudding, red velvet pudding and peanut butter pudding pie recipe.
Enjoy! -Julie
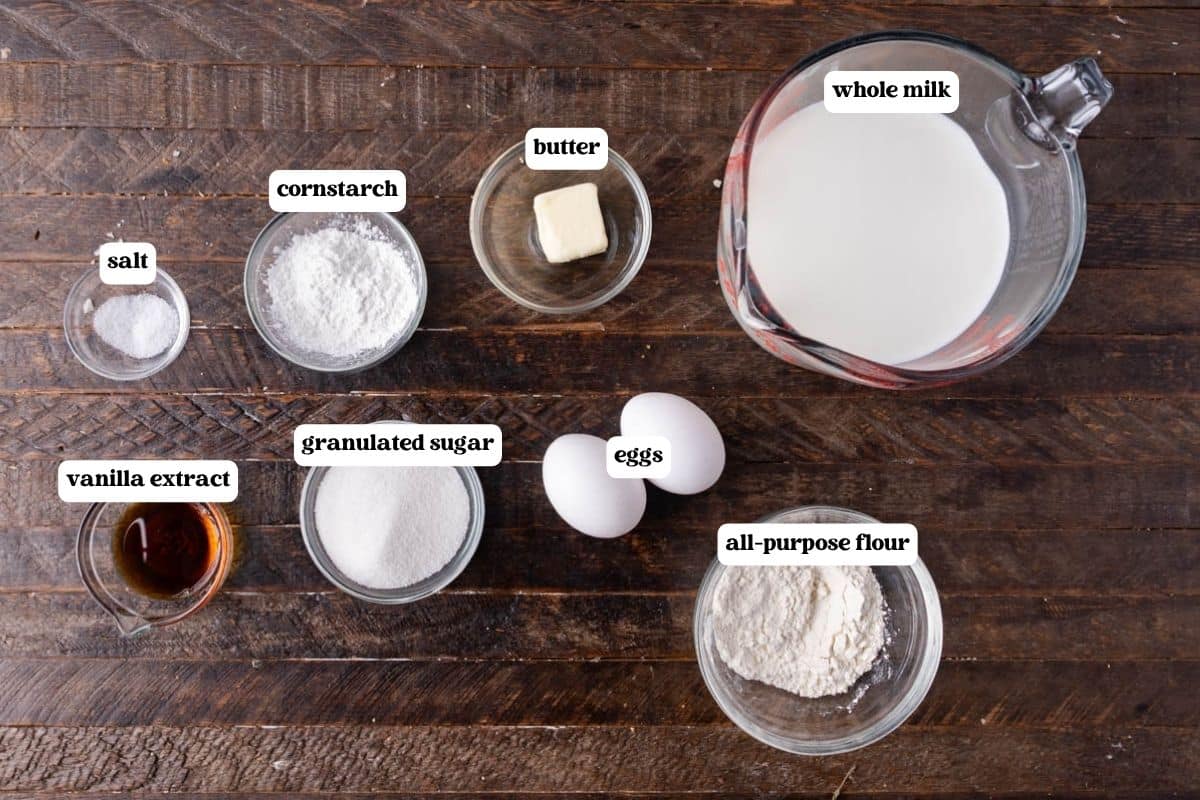
You don’t need anything special here. This is a pantry recipe through and through.
Cornstarch + All-Purpose Flour: This combo is what gives the pudding that classic thick, spoonable texture. Cornstarch alone can produce a slightly gel-like pudding. The flour adds that old fashioned feel.
Granulated Sugar (⅓ cup to start): The recipe is written on the less-sweet side. If you’re eating it plain or using it as a parfait base, ⅓ cup is perfect. If you want a sweeter pudding for snacking, bump it up to ½ cup. Taste and decide.
Whole Milk: Use whole milk for the creamiest result. 2% will work but the pudding will be slightly less rich.
Whole Eggs: Here’s where this recipe differs from most. Most online recipes use egg yolks only, which produces a richer, more custard-like pudding. Whole eggs make a slightly lighter, more classic American pudding texture. Both are great, but this one uses the whole egg so nothing gets wasted.
Salted Butter: Added at the end for richness and that glossy finish. Salted butter balances the sweetness.
Vanilla Extract: Use pure vanilla extract. A tablespoon is generous and you’ll taste the difference. Vanilla bean paste is a great upgrade if you have it.
See the recipe card for full ingredients and amounts.
Step 1: Mix the dry ingredients. In a small bowl, whisk together the cornstarch, flour, sugar, and salt. Set aside.
Step 2: Heat the milk. Add 2½ cups of milk to a medium saucepan over low heat. You want it hot but not boiling. Look for little wisps of steam, bubbles just starting to form at the edges. The milk should be about 200ºF.
Step 3: Make the egg mixture. While the milk heats, whisk together the remaining ½ cup of milk and the eggs. Then sift the flour mixture over the eggs and whisk quickly until completely smooth with no lumps. This method is your insurance against a lumpy pudding.
Step 4: Combine and cook. Pour the egg mixture into the hot milk along with the butter and vanilla. Whisk well, then switch to a wooden spoon or silicone spatula and stir constantly over low-medium heat for about 1 minute, until the pudding thickens and coats the back of your spoon. It will get to about 165ºF. It thickens quickly once it starts so watch closely!
Step 5: Pour and chill (or eat warm). Pour into individual serving dishes or a bowl. A piece of plastic wrap pressed directly onto the surface of the pudding will prevent a skin from forming. Refrigerate at least 1–2 hours for a fully set, cold pudding or eat it warm right off the stove. My husband agrees that both are completely valid.
Lumpy pudding is almost always caused by one of two things: adding cold eggs directly to hot milk, or not stirring constantly once the mixture is hot.
The fix for both:
Our method in this recipe solves the egg problem entirely. By mixing your eggs with milk and the dry ingredients first, you’re gradually tempering the eggs before they ever touch the hot liquid. No scrambled bits, no curdling.
For the stirring issue, keep your heat at low-medium and don’t stop moving the pudding once the paste hits the pan. It thickens quickly once it hits temperature, and that’s when lumps can form if you’re not paying attention. A silicone spatula that reaches the corners of the saucepan is your best tool here.
If you do end up with a few lumps despite your best efforts: strain the pudding through a fine mesh sieve while it’s still warm. Problem solved.
Not exactly, but they’re closely related and it can be confusing.
Traditional vanilla custard relies almost entirely on egg yolks for thickening, producing a silkier, richer, more luxurious texture like with our frozen custard. That dense, creamy consistency comes from the yolk proteins setting slowly.
Vanilla pudding uses a starch thickener (cornstarch, flour, or both) in addition to eggs, which is why it sets faster and has a slightly different, more familiar American texture. This recipe is definitely pudding: made on the stovetop, starch-thickened, ready in 20 minutes.
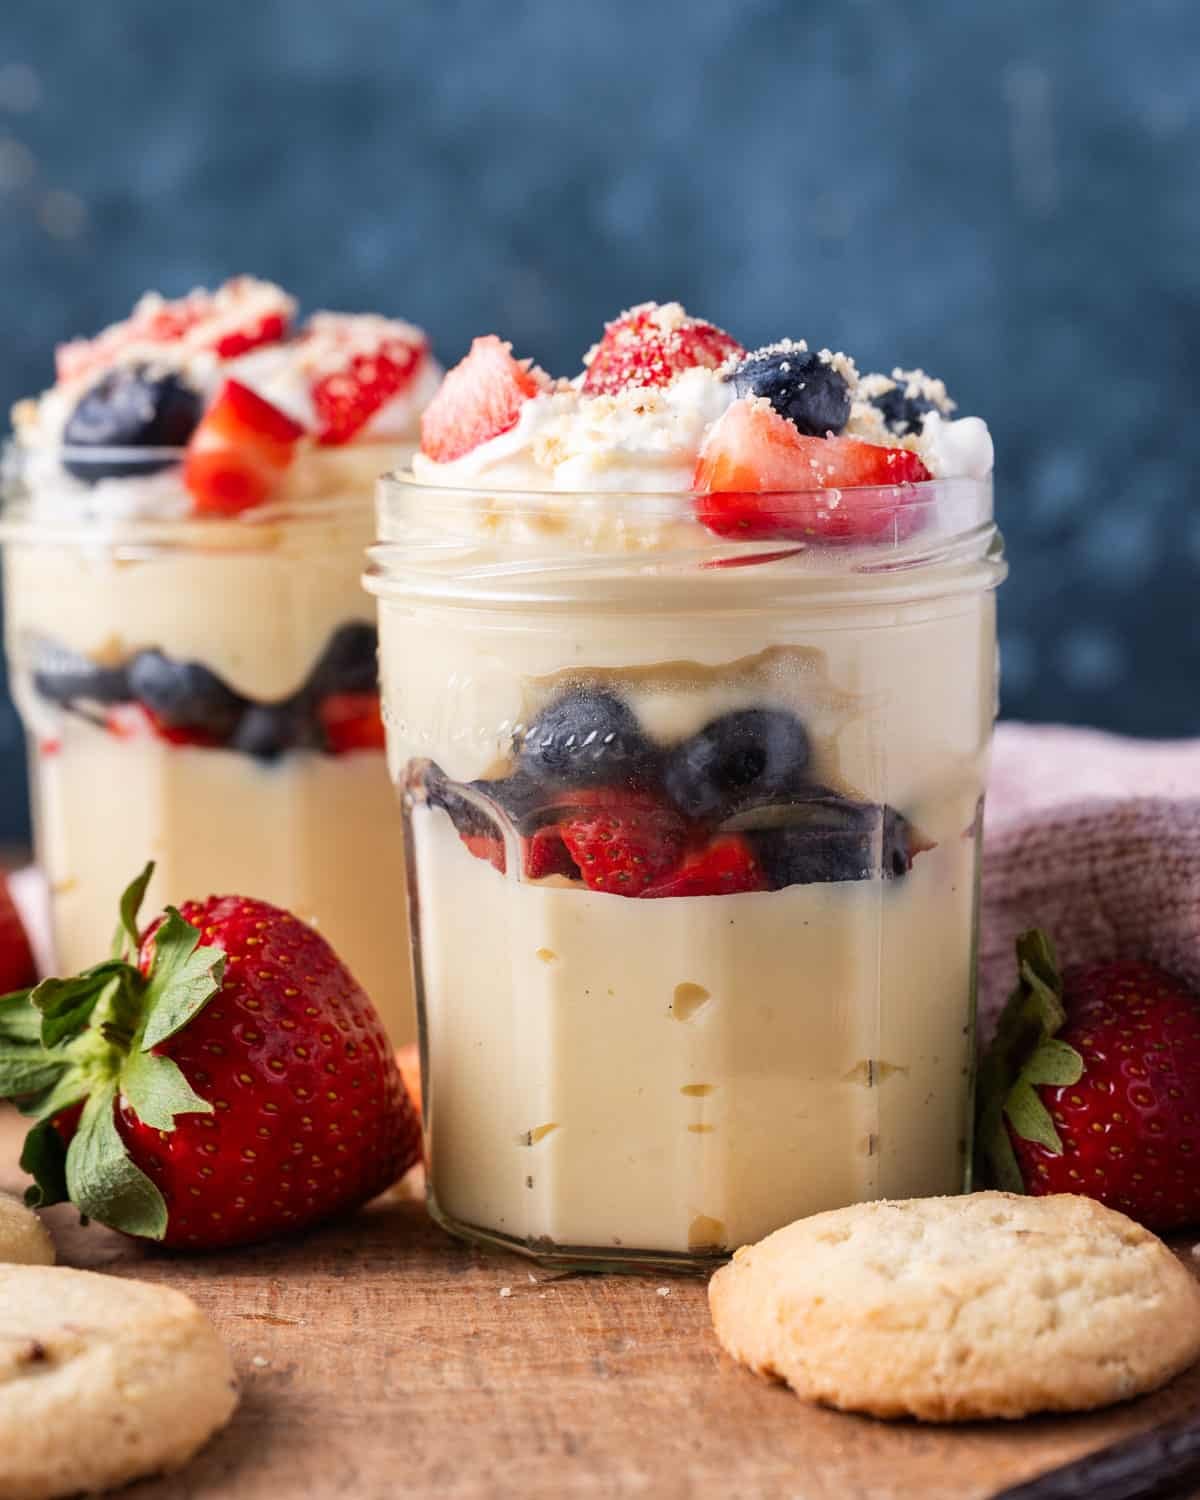
This pudding is specifically designed as a base, not just a snack. Here’s how we use it most:
Mixed Berry Parfait for July 4th This is our favorite make-ahead summer dessert. Layer the cooled pudding in jam jars with fresh blueberries, strawberries, and raspberries and crushed pecan sandies between layers. Top with a dollop of whipped cream and refrigerate overnight.
Cake Filling The not-too-sweet profile of this pudding makes it a dream for cake filling — it won’t make layers soggy and the flavor doesn’t compete with frosting. Use it between layers of vanilla cake or yellow cake with sliced bananas for a homemade banana pudding cake situation that will make everyone very happy.
Banana Pudding Base Layer it in a trifle dish for homemade banana pudding with sliced bananas, and whipped cream. A classic.
Just a Bowl with Fresh Fruit Don’t underestimate this one. Warm or cold, with sliced peaches or fresh berries and a sprinkle of brown sugar, it takes just 5 minutes once the pudding is made.
Fridge: Vanilla pudding keeps beautifully in an airtight container in the refrigerator for up to 4 days. Press plastic wrap directly against the surface before sealing to prevent a skin from forming (which can also make the pudding lumpy).
Can you freeze pudding? Technically yes, but it can become grainy or watery. For best results, eat it within 4 days from the fridge.
Make-ahead timing: This pudding is an excellent make-ahead dessert. Make it up to 2 days ahead for parfaits or layered desserts. The flavors actually deepen a little overnight.